Return Transactions
This guide explains the steps to add a return transaction in Jova POS. Return transactions are used to process product returns made by customers or suppliers. You can view the return status and verify transactions being processed.
Return Transaction Flow
Here is the general flow for the return transaction process in Jova POS:
- Access the Transactions → Return Transactions menu.
- Add a new Return Transaction (RT).
- Fill in the return transaction information.
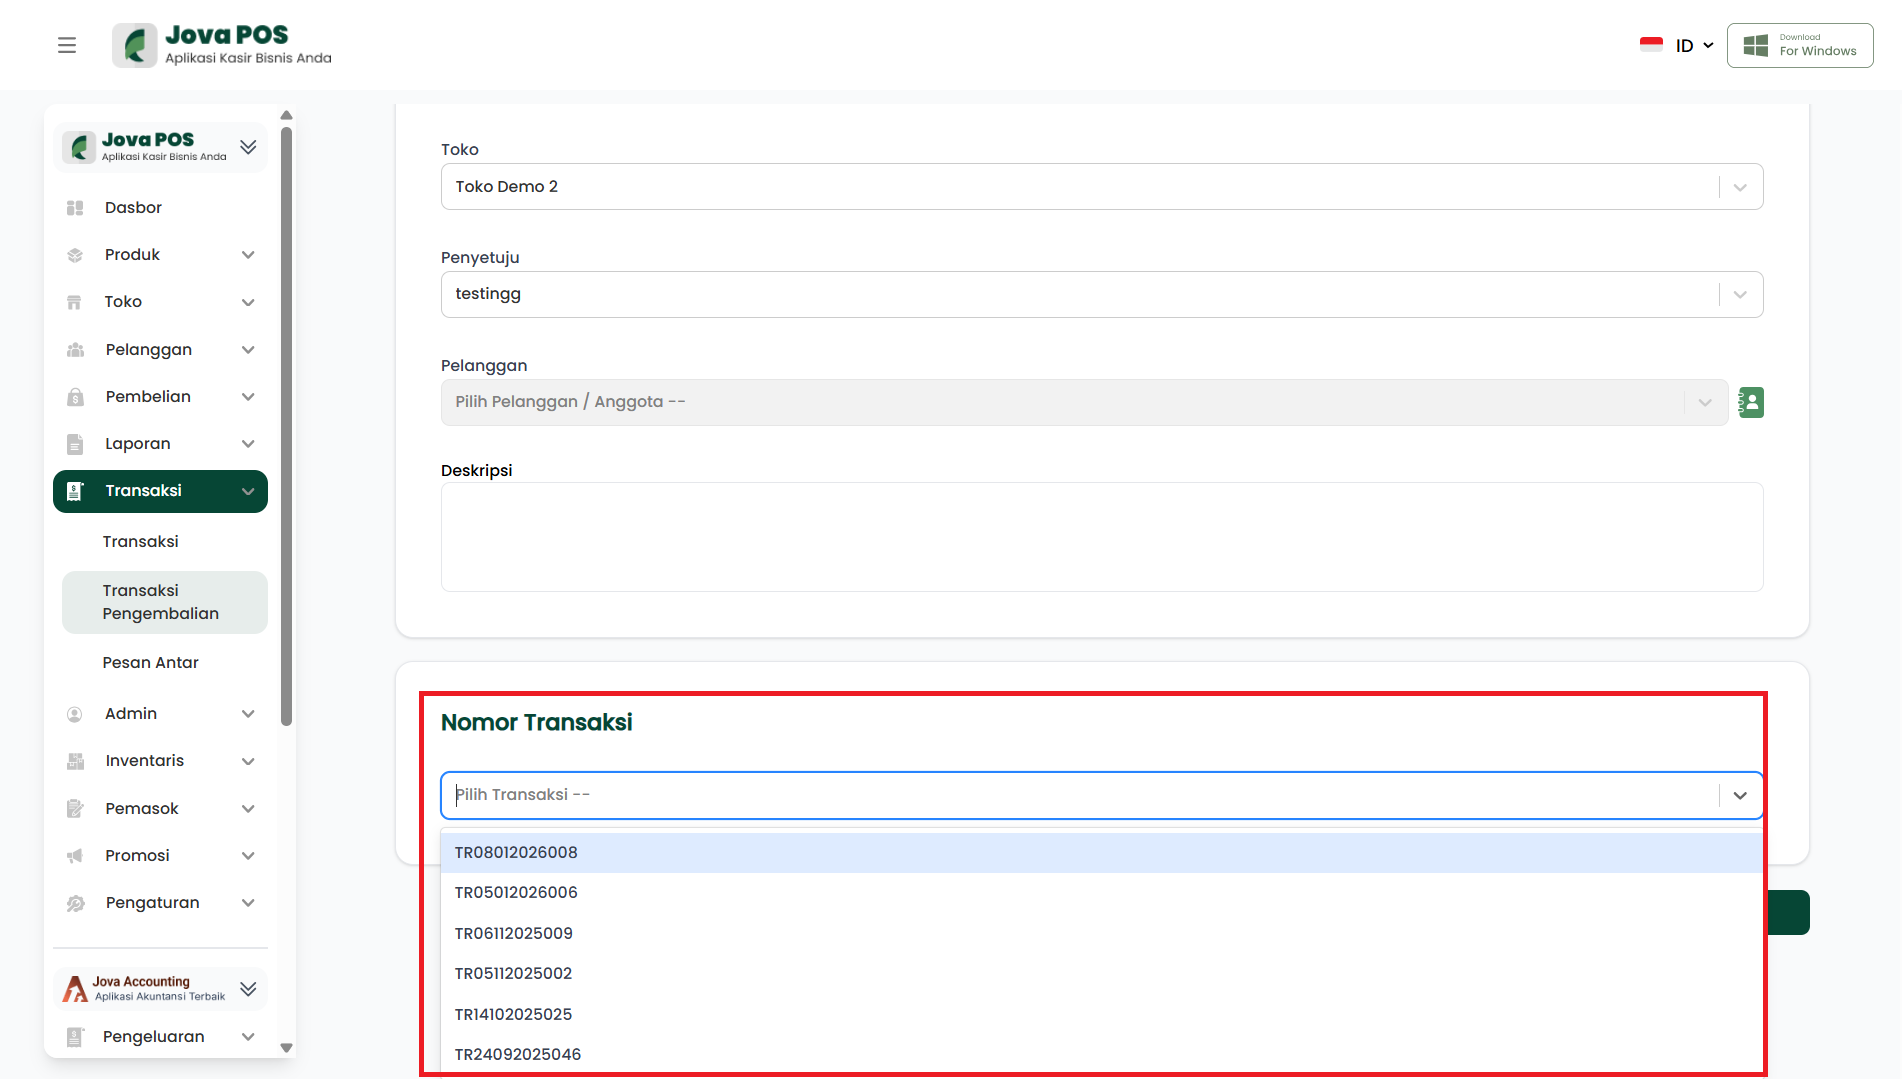
- Select the Transaction Number to be returned.
- Click Save to save the return transaction.
- After clicking Save, the return transaction will immediately appear in the table with "Pending Approval" status.
1. Accessing the Return Transactions Menu
The first step is to open the Return Transactions page:
- In the sidebar, click the Transactions menu.
- Select Return Transactions.
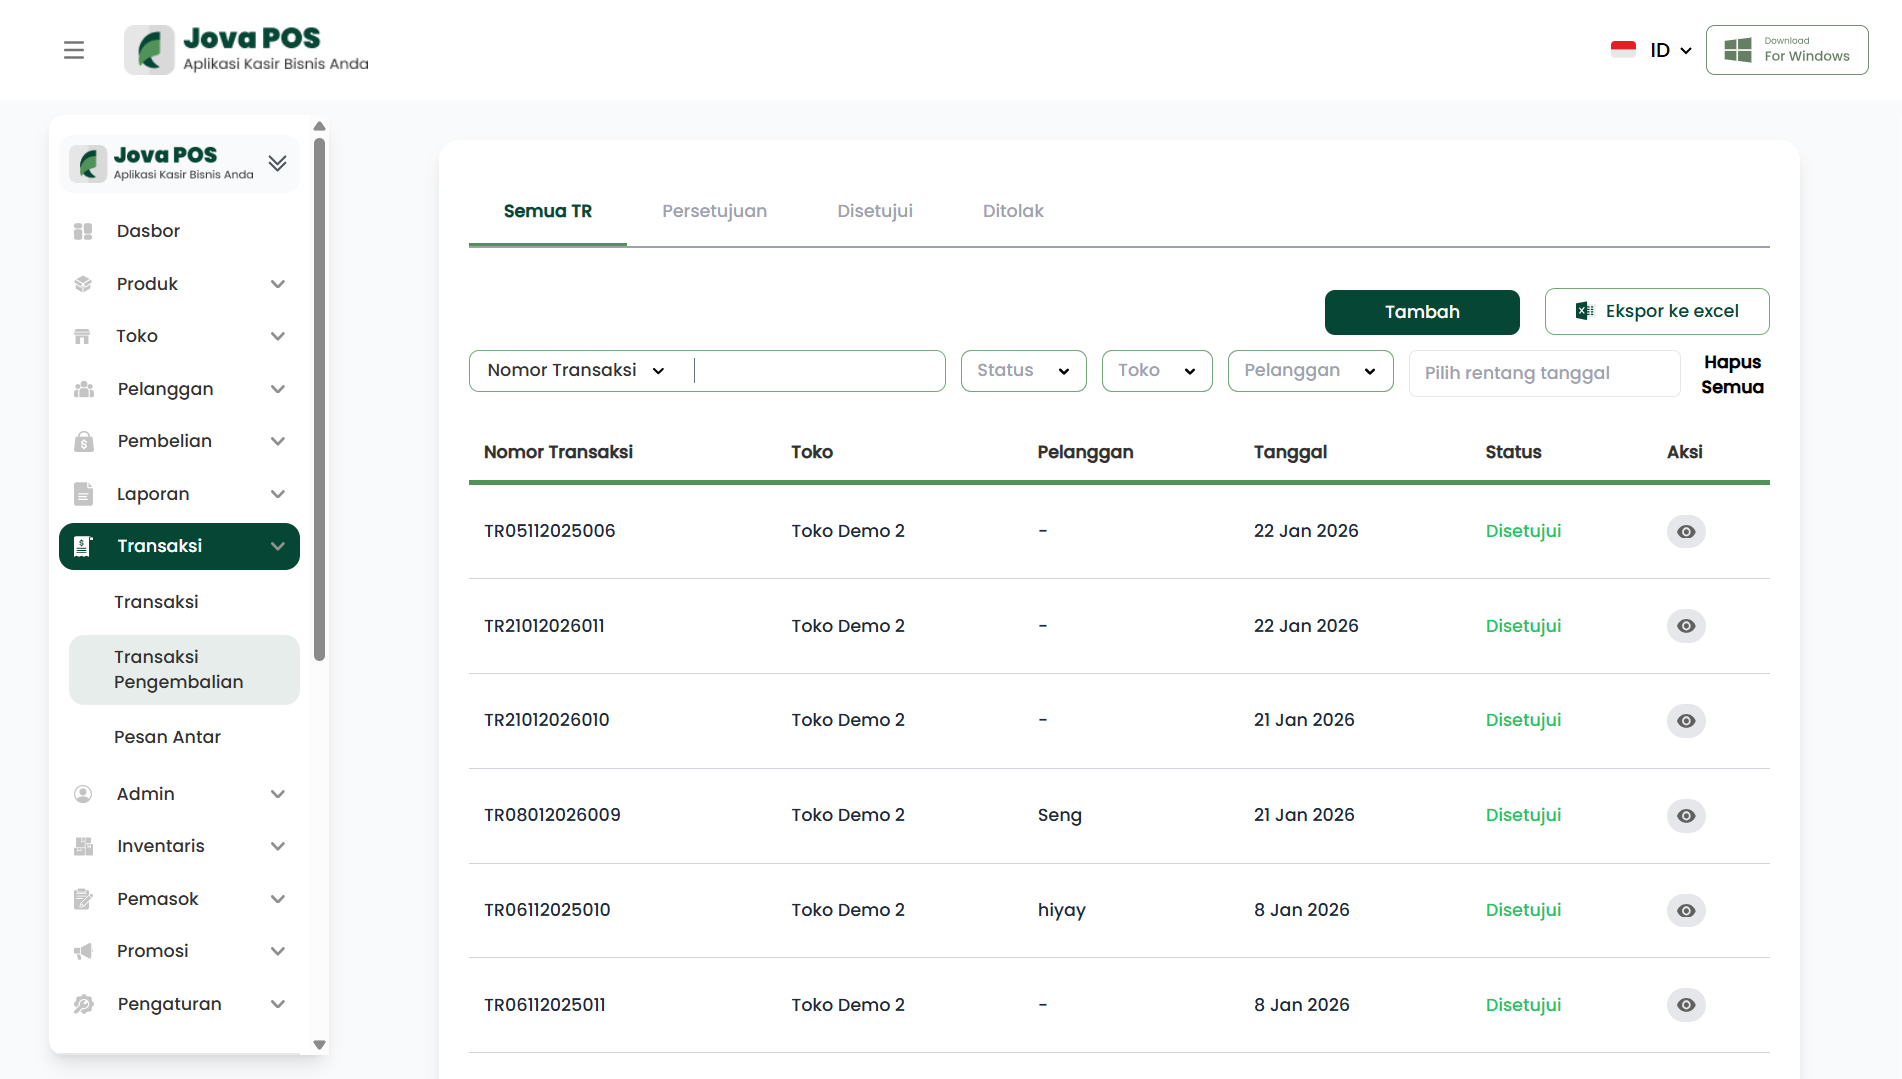
2. Adding a Return Transaction (RT)
After being on the Return Transactions page, you will see a list of existing returns. To add a new return transaction:
- Click the Add button located at the top right corner of the page.
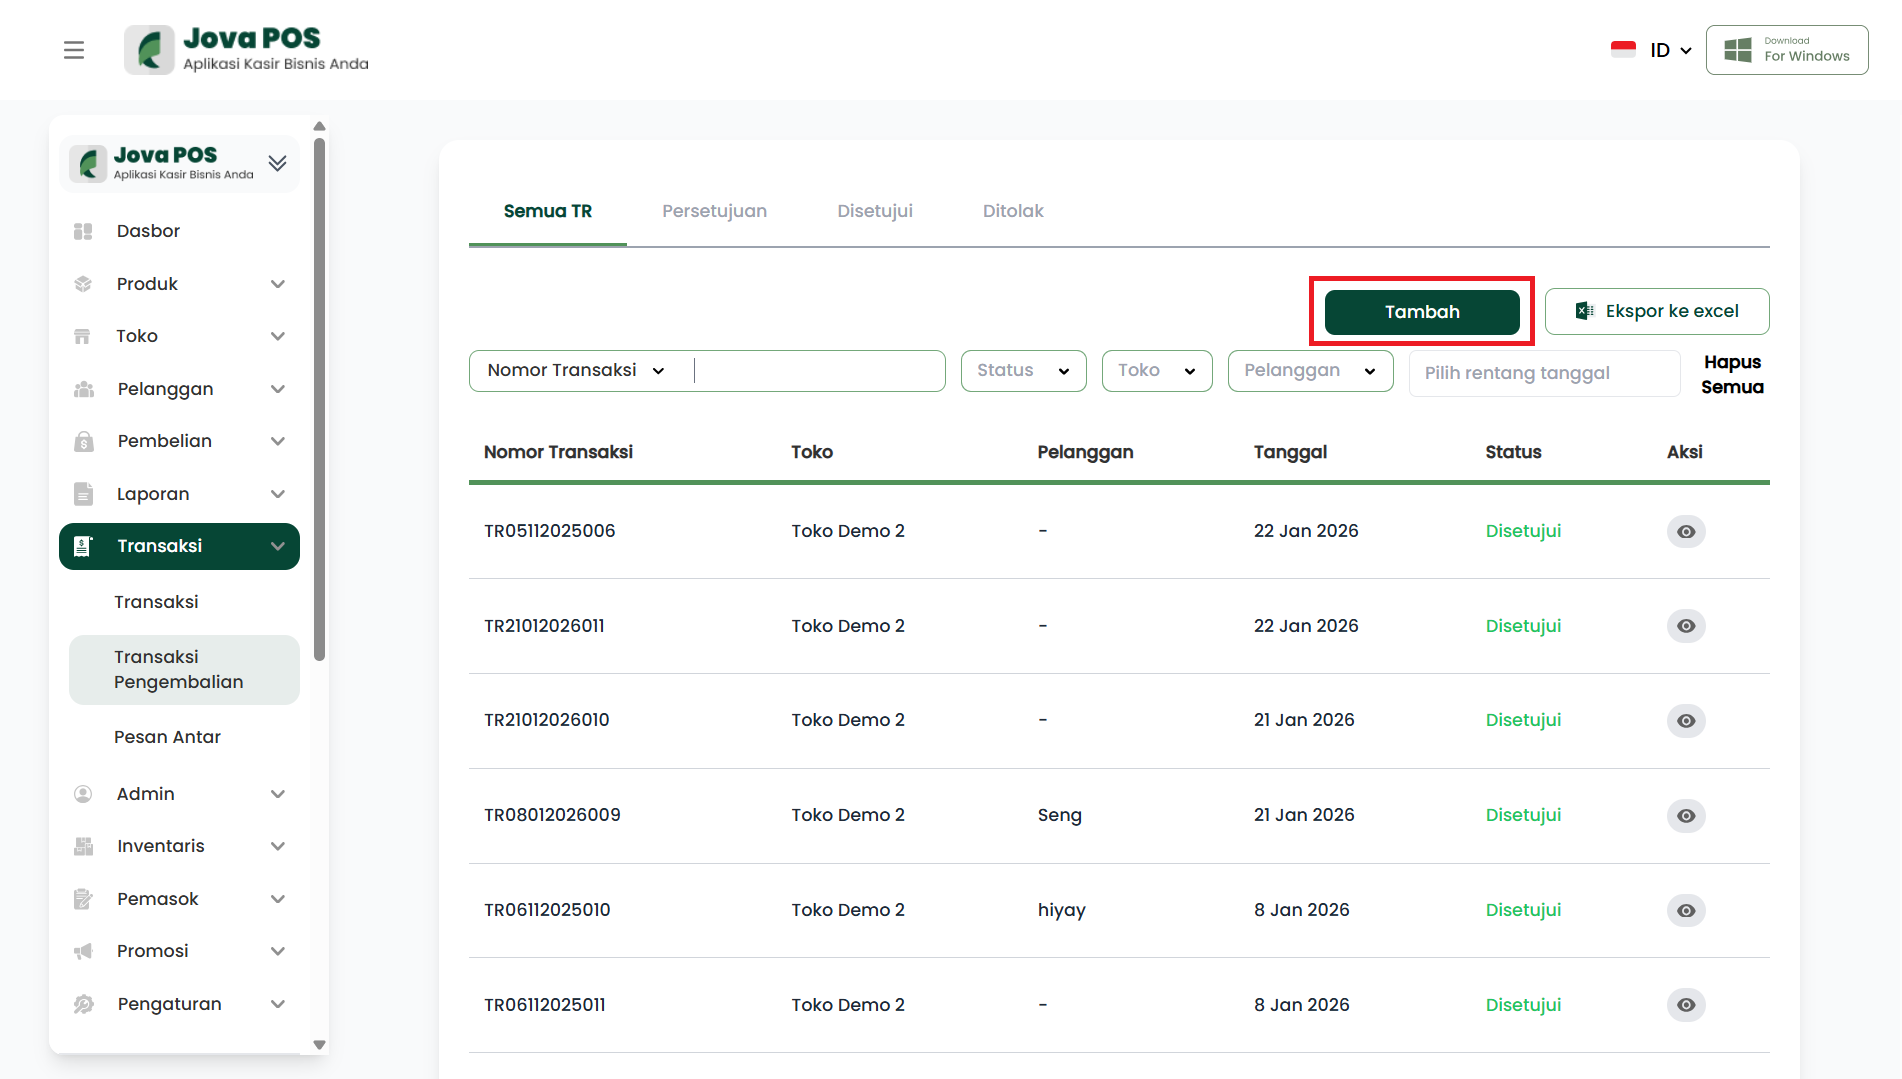
- After that, the Add Return Transaction page will appear to fill in the return transaction details.
3. Filling in Return Transaction Information
On the Add Return Transaction page, you will be asked to fill in several important pieces of information as follows:
-
Supplier Name: Select the supplier name from the available list. This supplier name will be associated with the returned products.
-
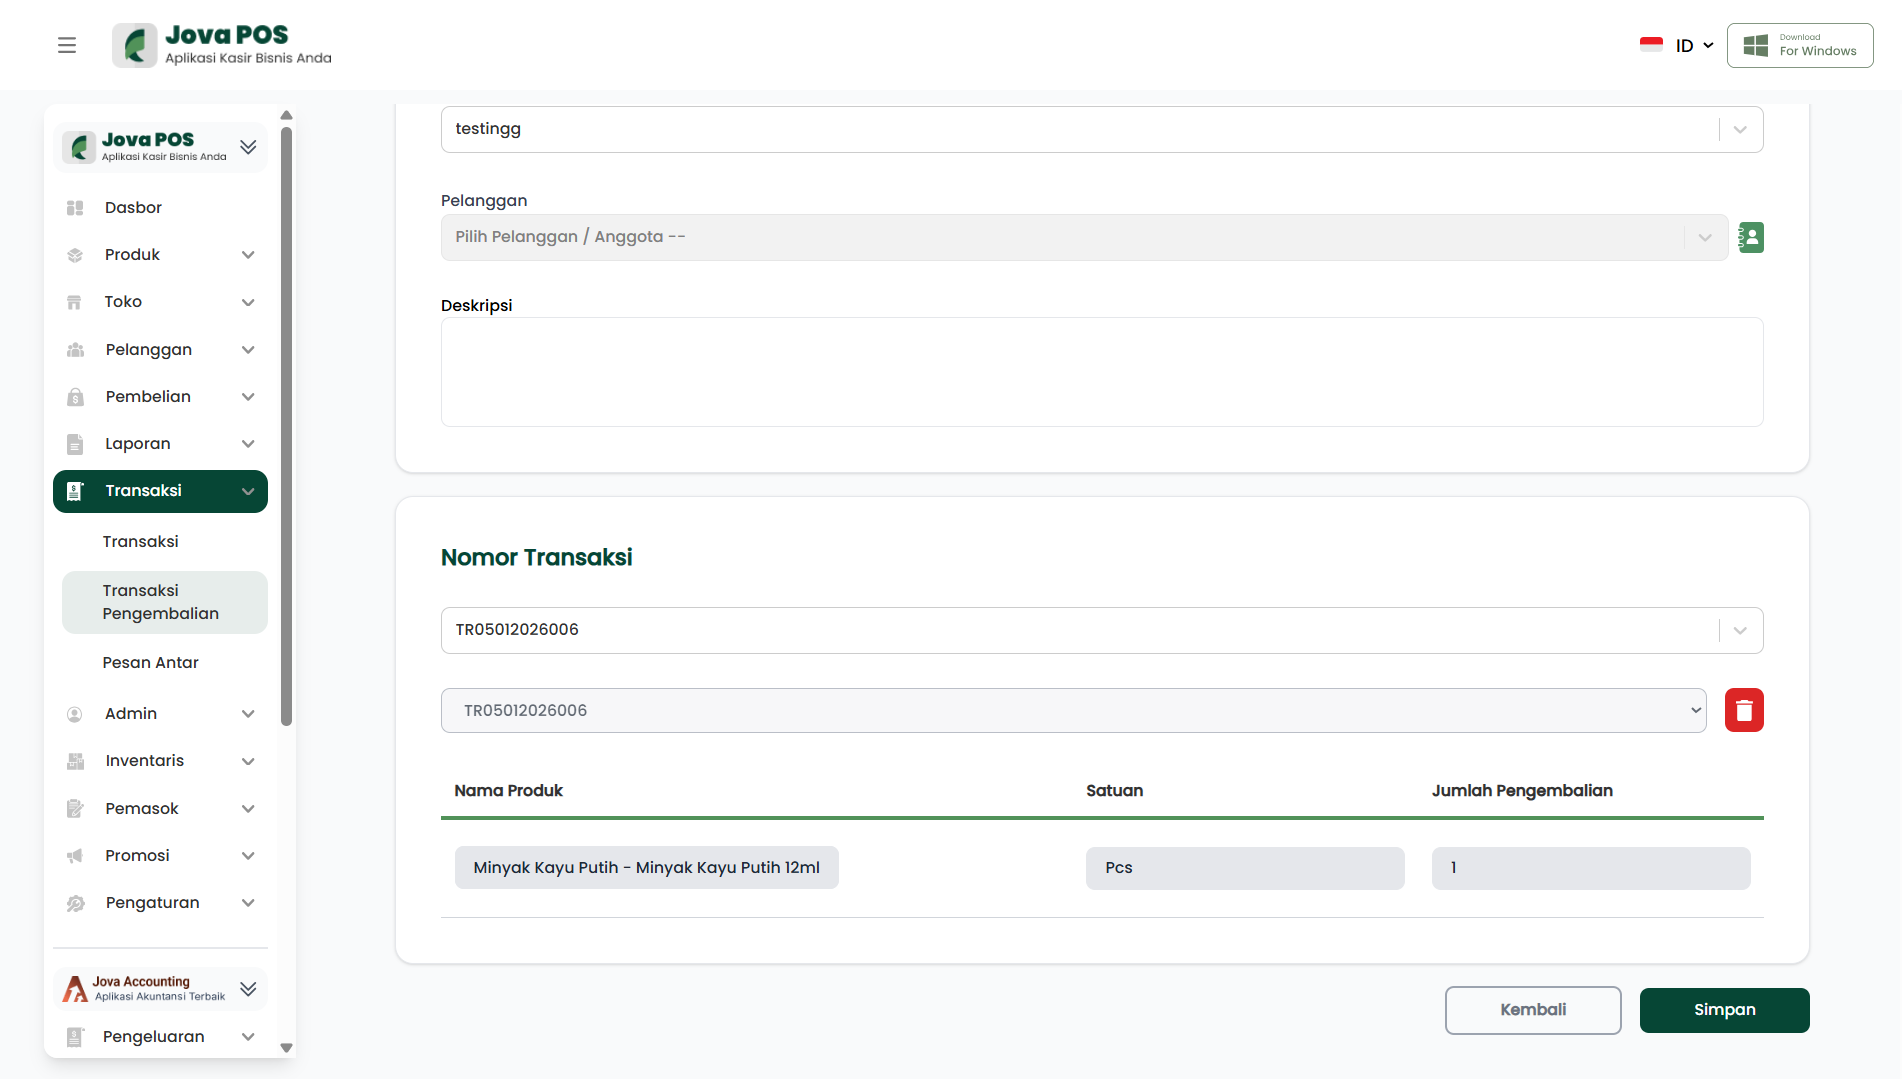
Transaction Number: Select the transaction number from the list already recorded in the system. This transaction number will be used to identify previously made transactions.
-
Quantity of Returned Items: Specify the number of products being returned. Make sure the quantity matches the items to be returned.
-
Description: If needed, add a return description (e.g., reason for return or condition of returned items).
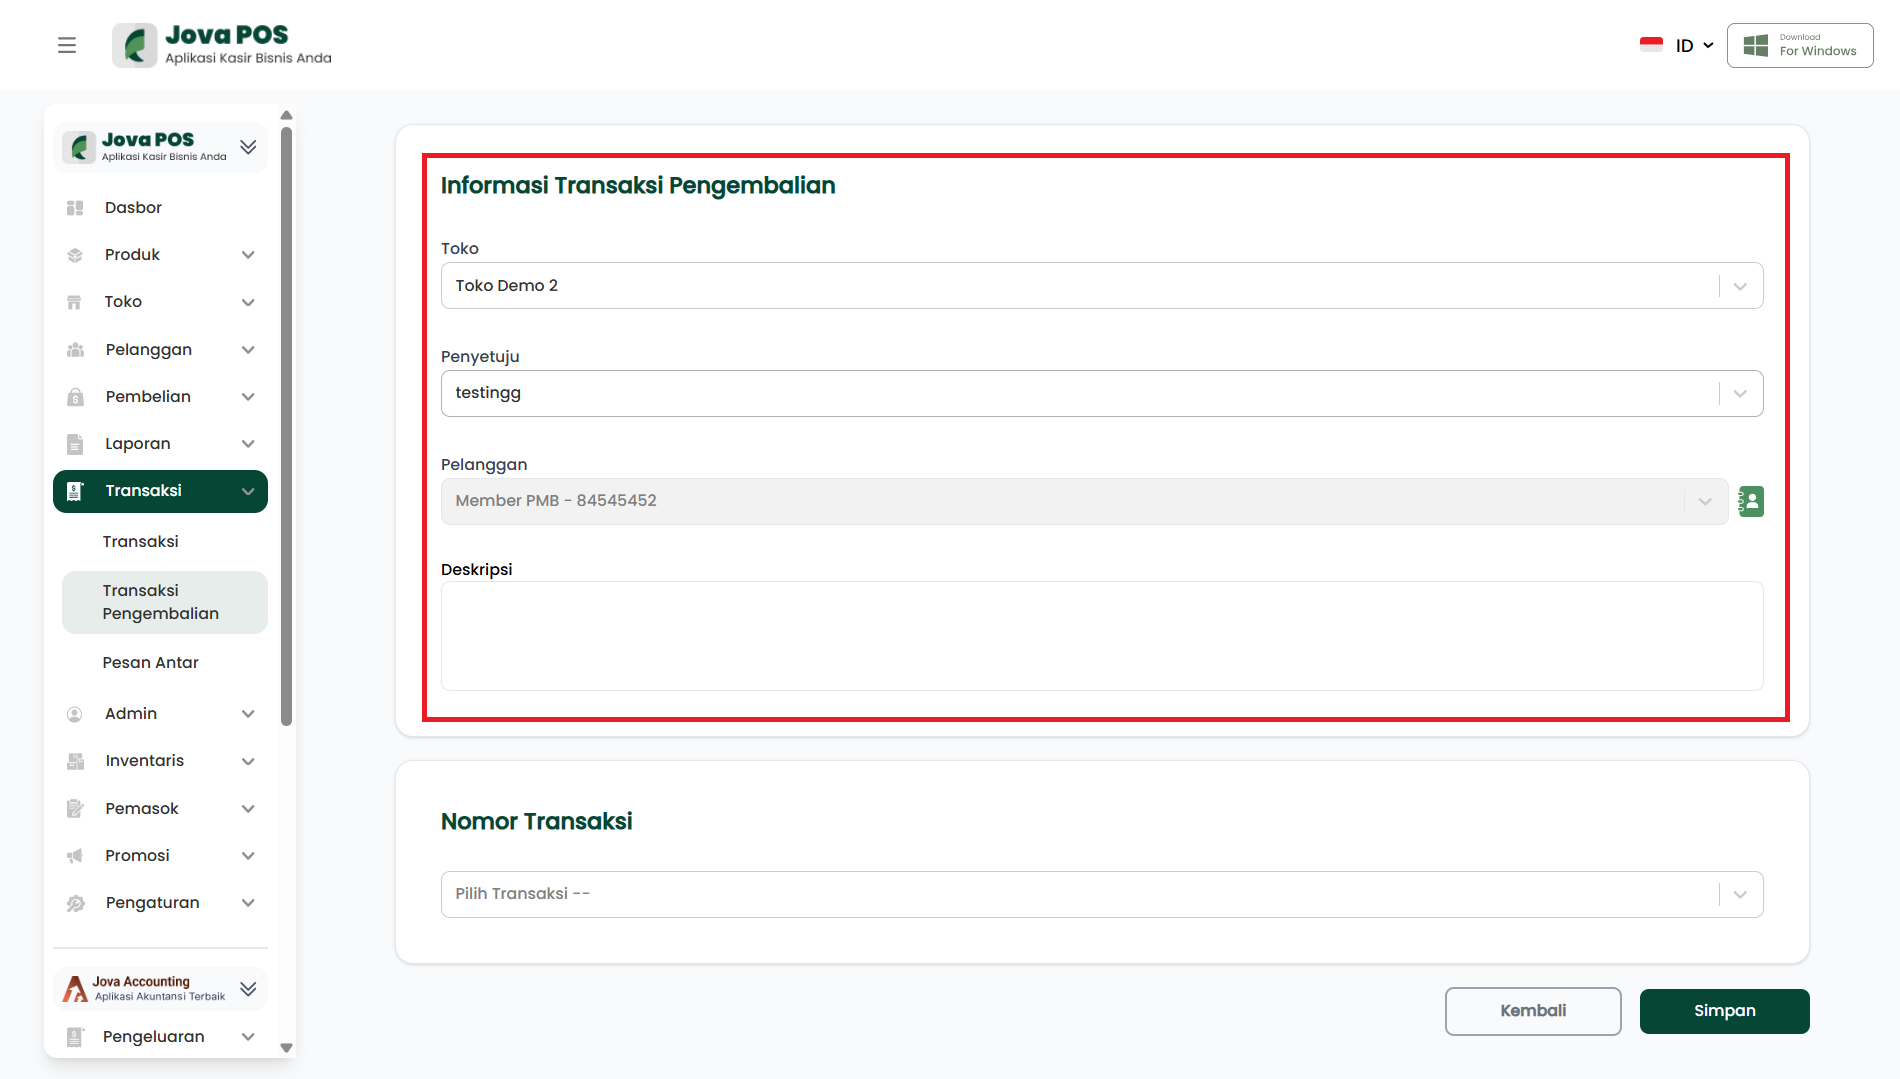
4. Selecting Transaction Number
Select the transaction number to be returned. This transaction number is a previously recorded transaction in the system. You can search for transactions using filters based on Supplier Name or Date Range.
After selecting the transaction number, the system will display product information that was purchased in that transaction.
5. Click Save
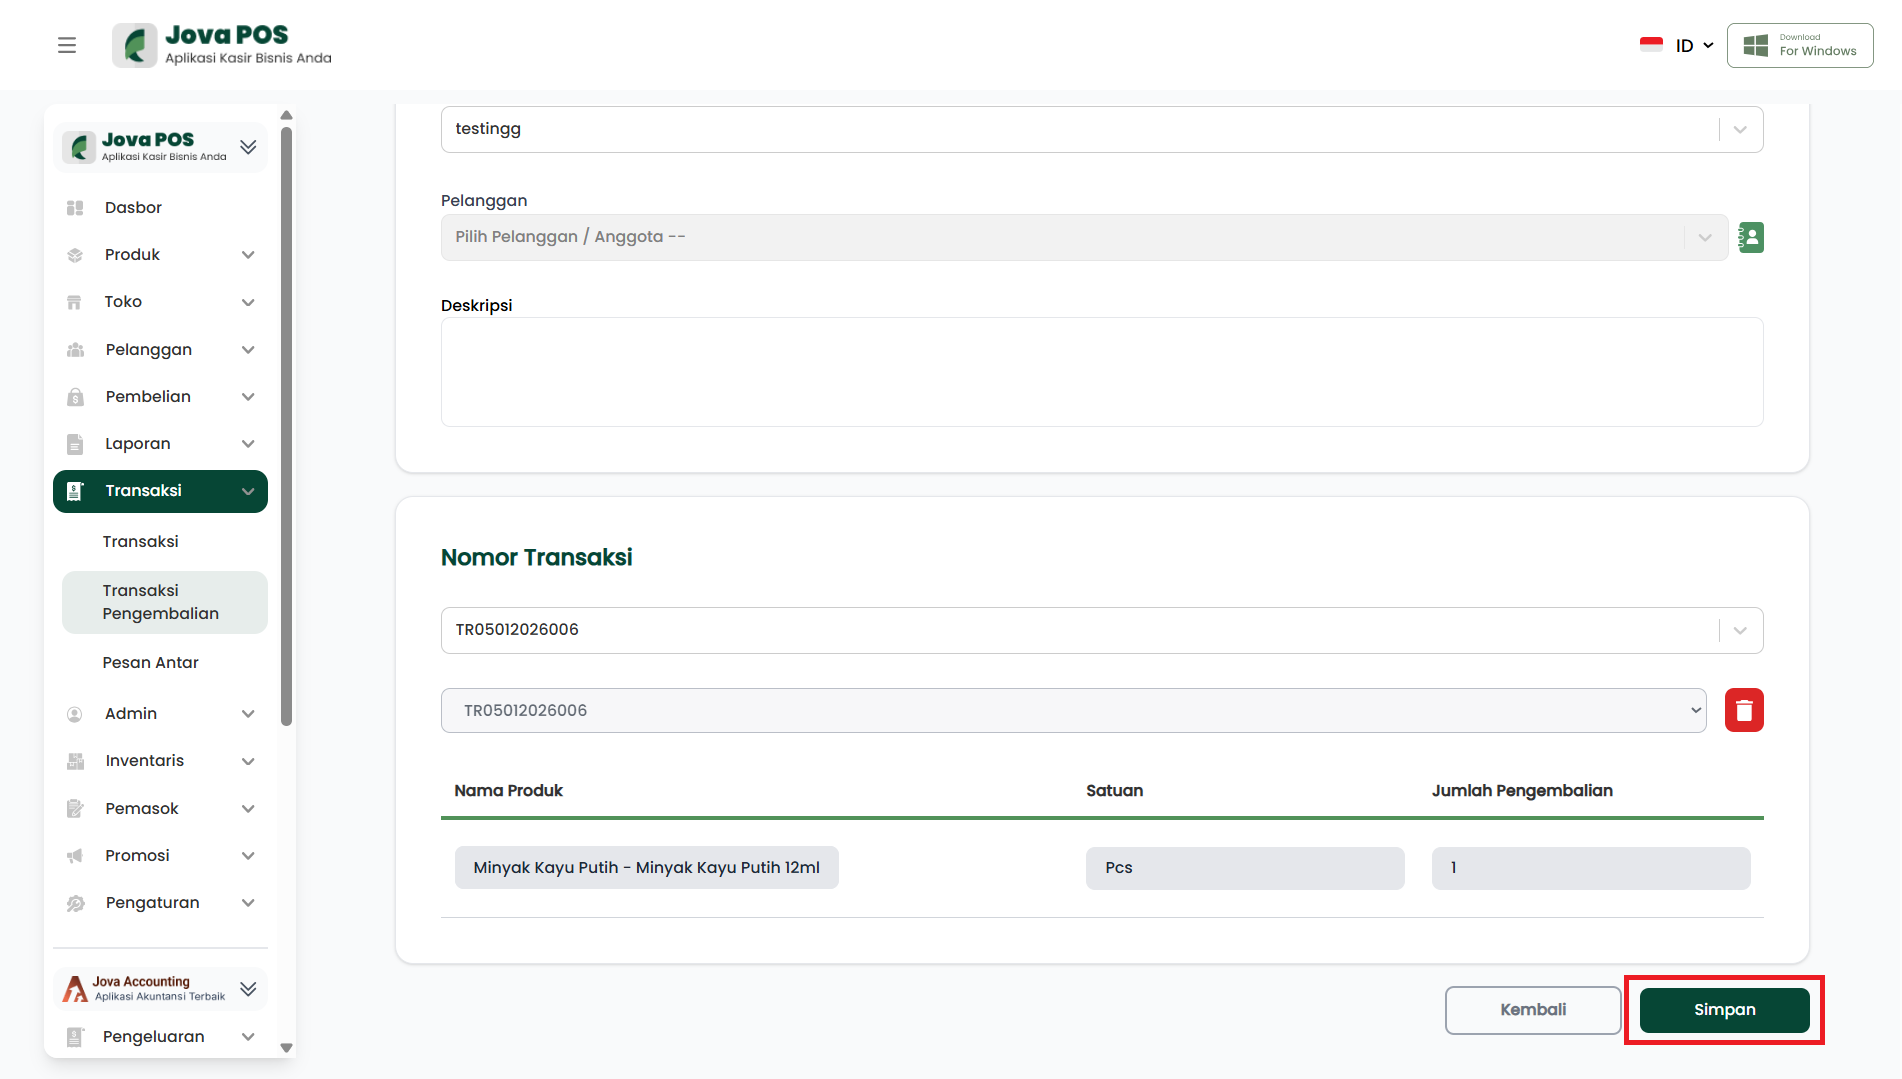
After filling in all the return transaction details, click the Save button to save the return transaction.
- The system will save the return transaction and add it to the existing return list.
- After that, the transaction status will be changed to "Pending Approval".
6. Return Transaction Appears in Table with "Pending Approval" Status
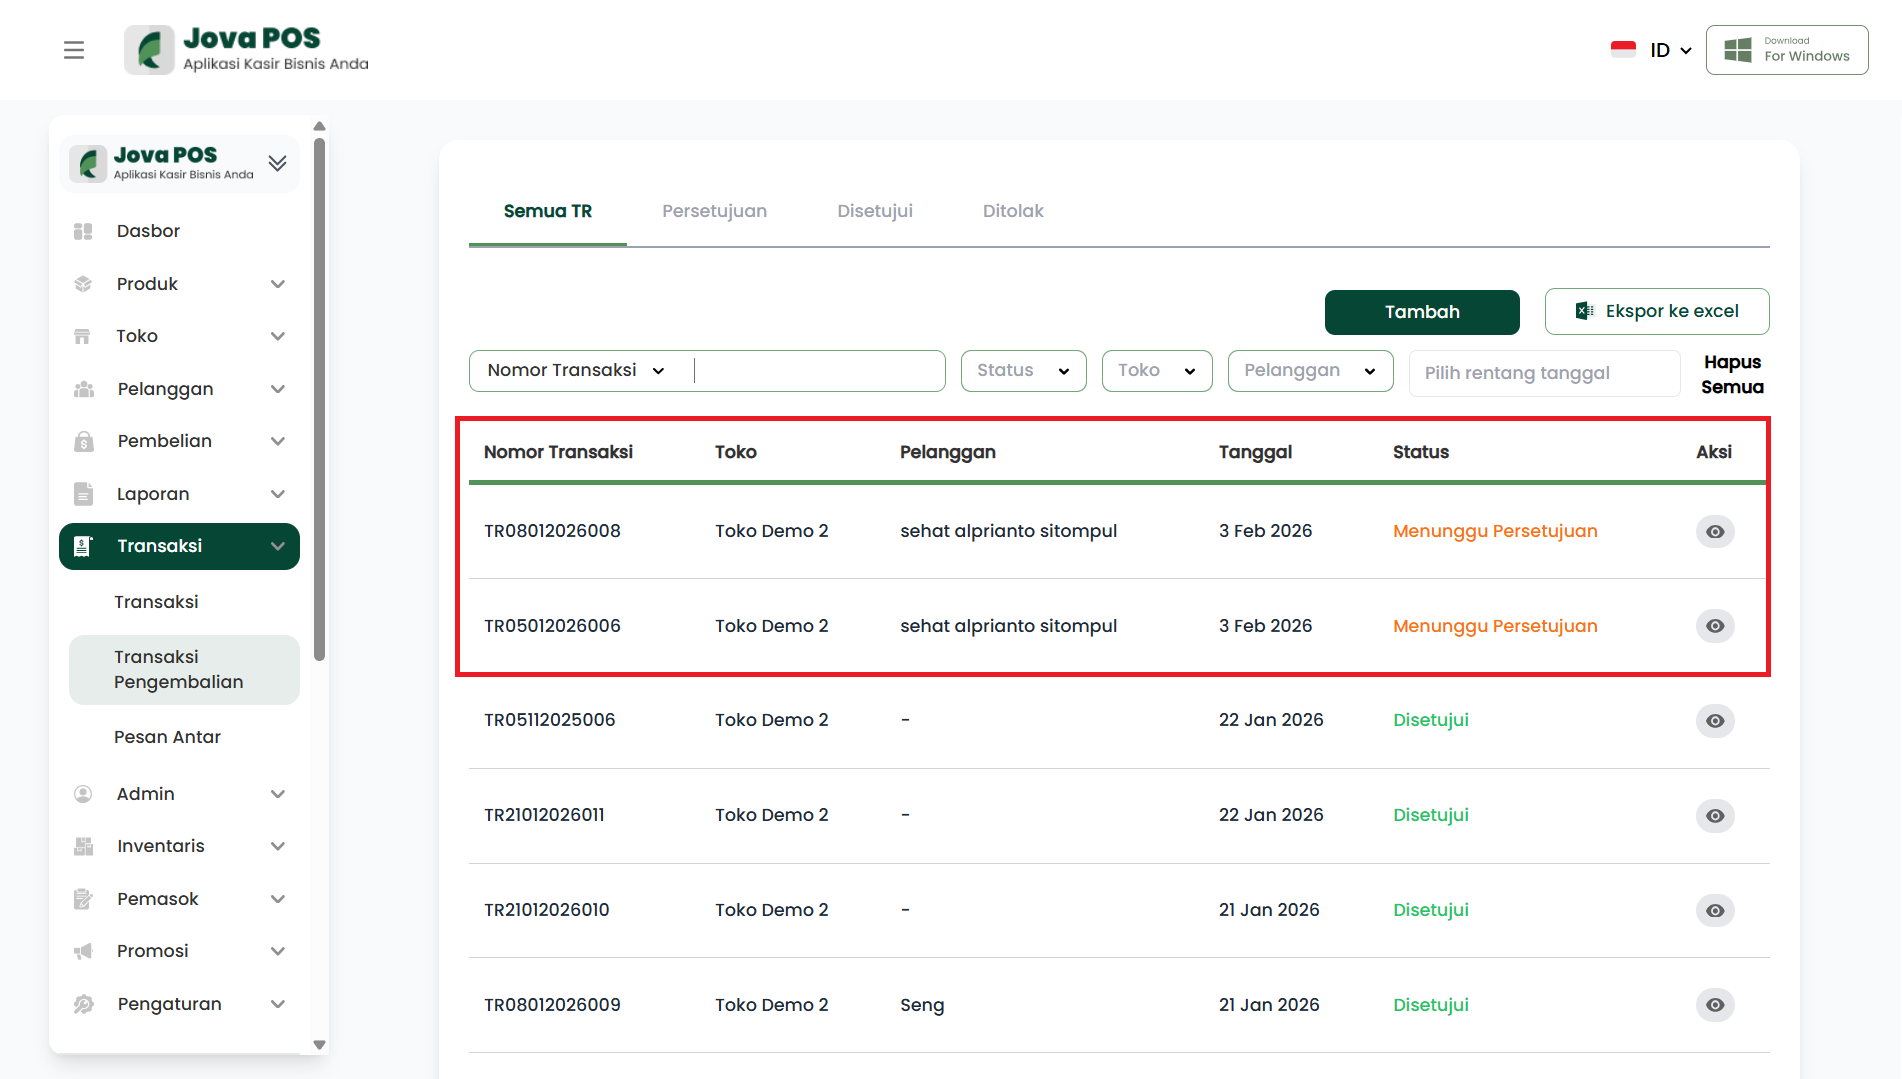
After you click Save, the return transaction will immediately appear in the Return Transactions table. The transaction status will appear with the "Pending Approval" label.
This indicates that the return transaction has not been approved or processed further. Users with appropriate access rights (such as Admin or Owner) will verify this transaction.
Return Transaction Table View
7. Optional Features
7.1. Search and Filter
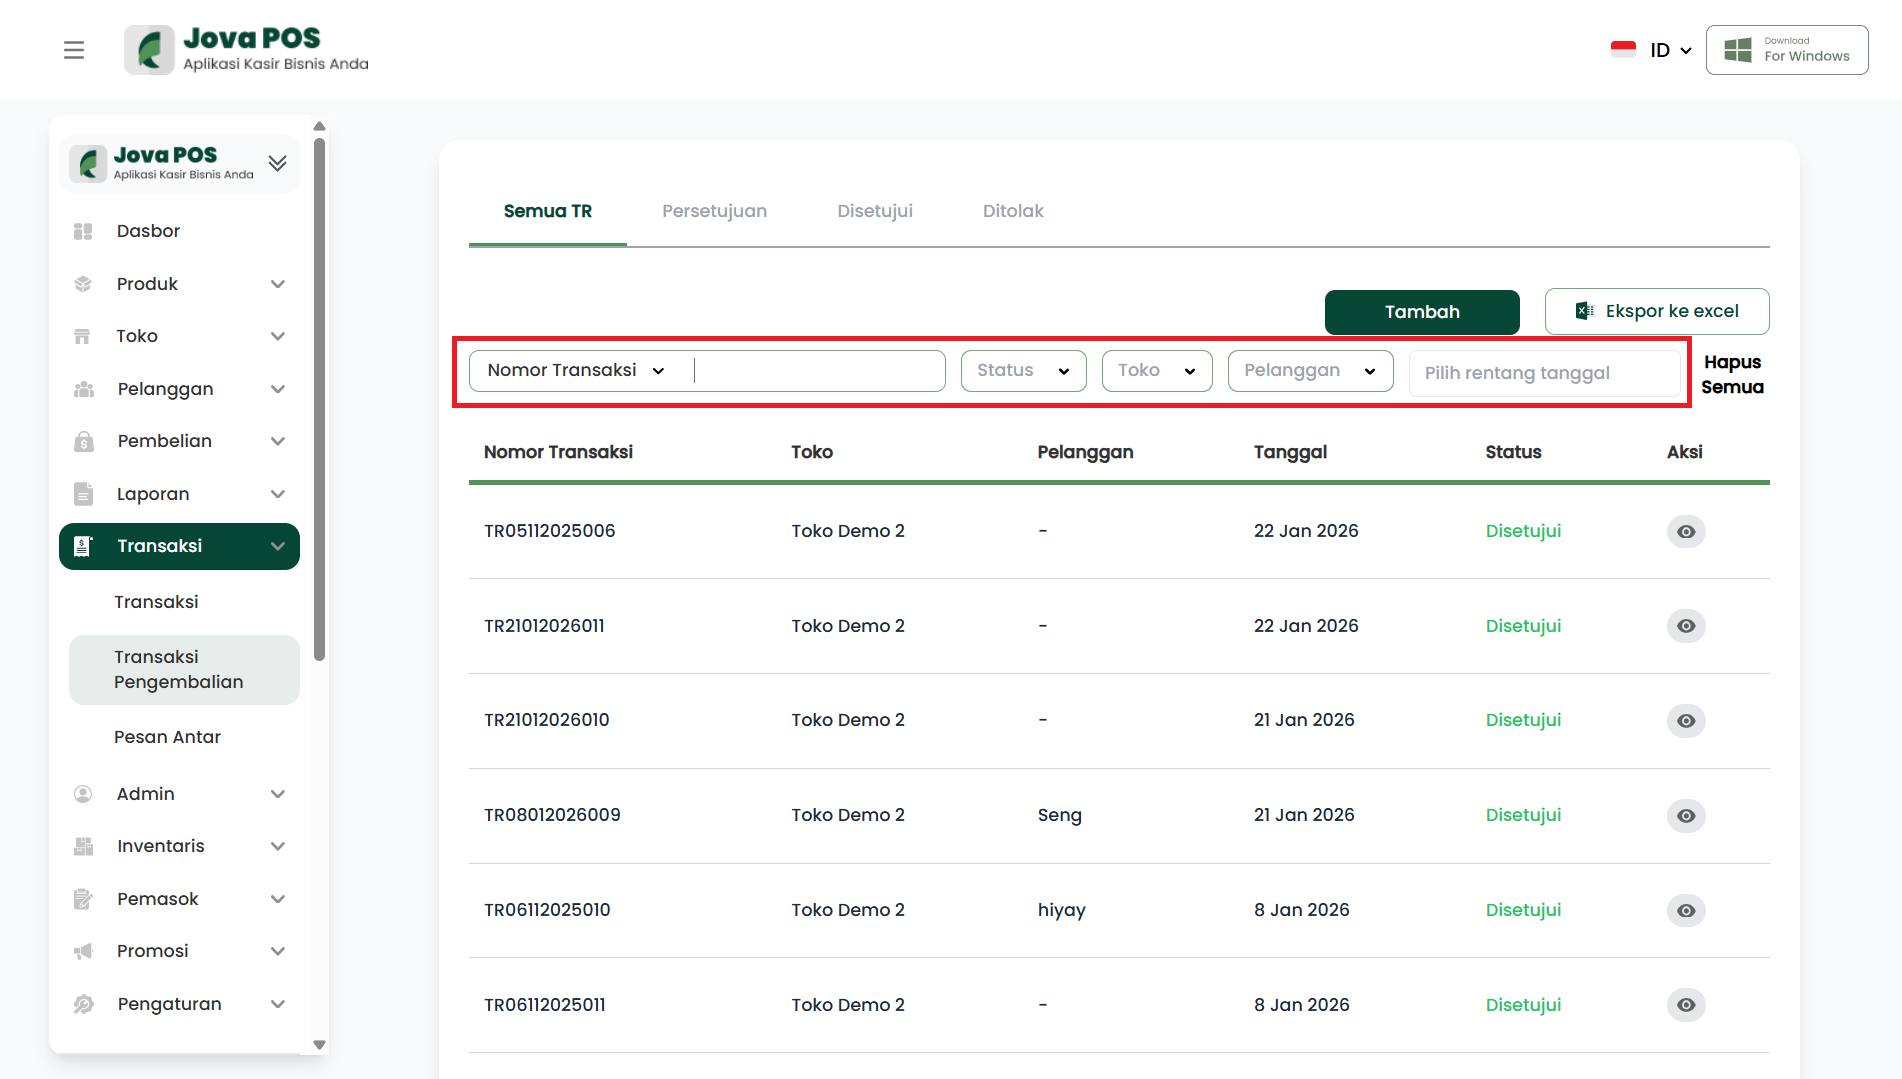
On the Return Transactions page, you can use the search and filter features to make it easier to find return transactions based on specific criteria.
- Search: Type the Transaction Number, Supplier Name, or Date to find a specific transaction.
- Filter: Use the Supplier Name dropdown to select the supplier whose report you want to view, or select the Date Range to view return transactions in a specific period.
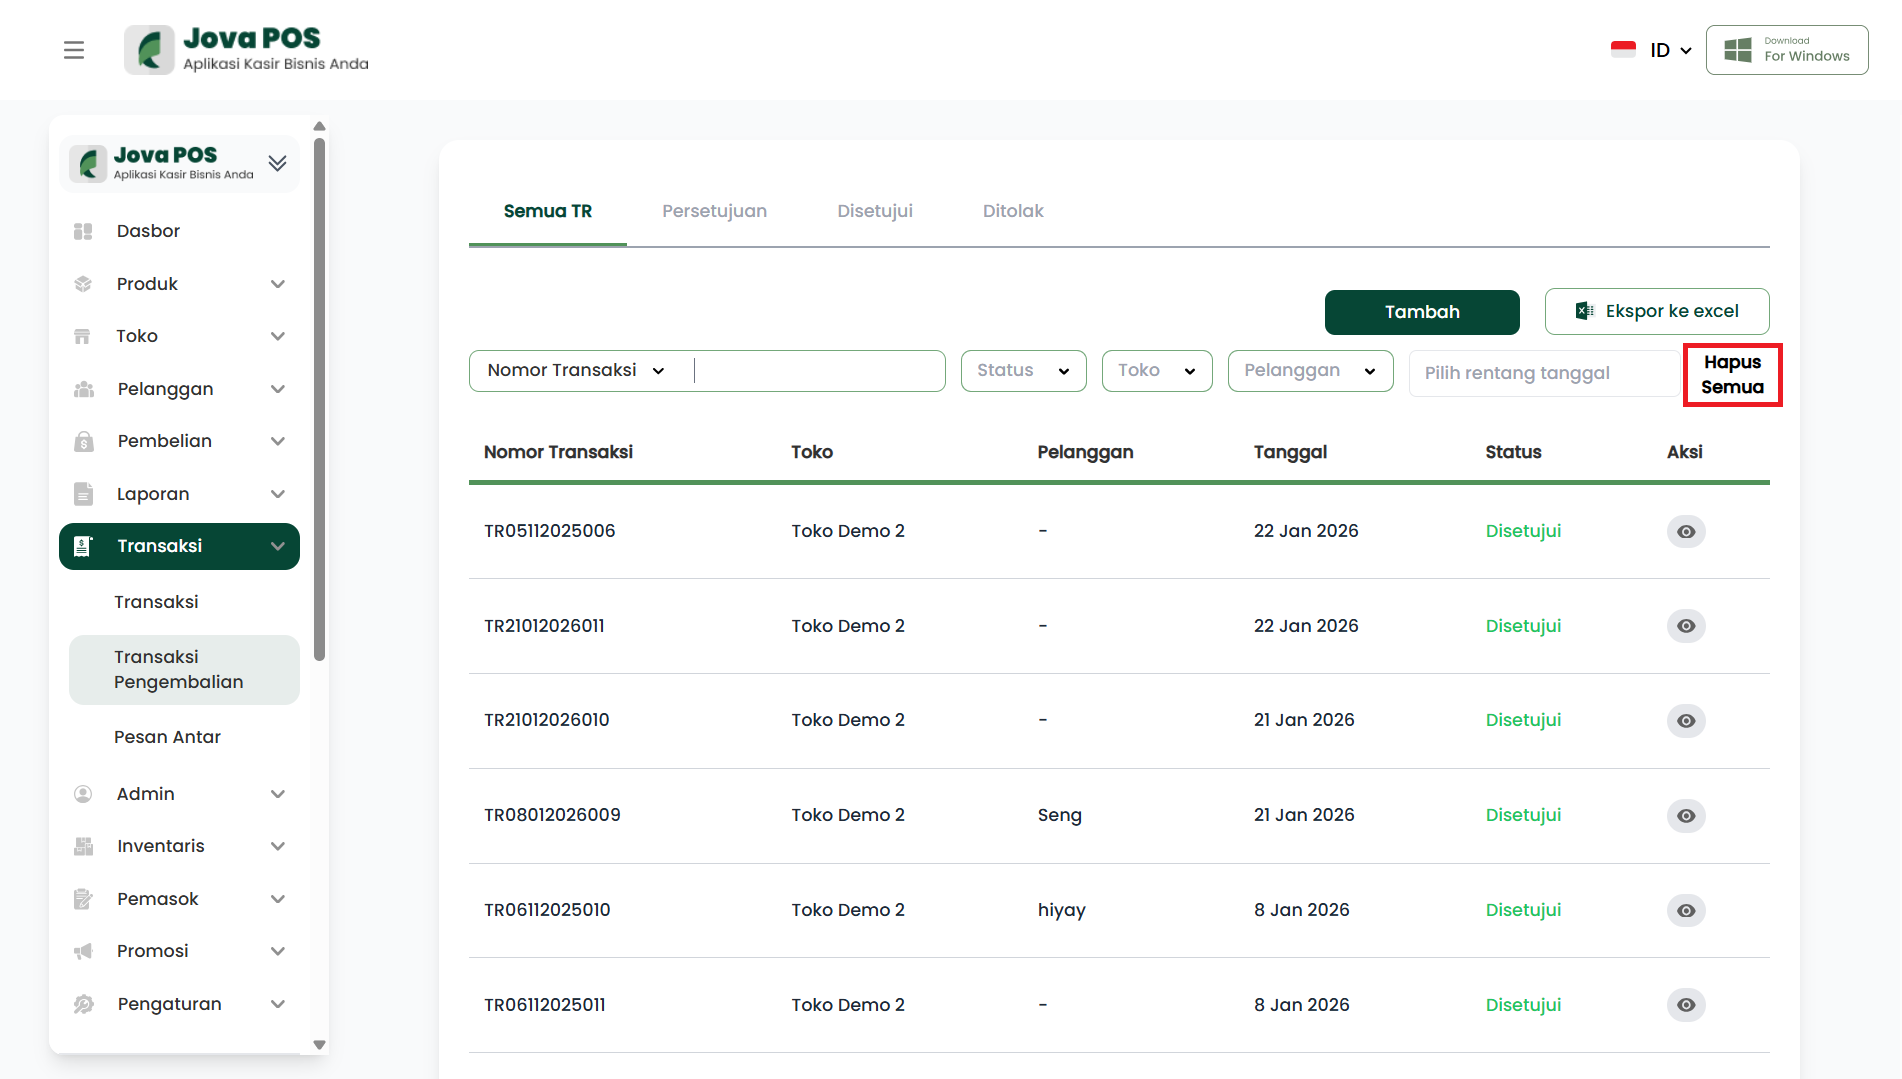
7.2. Clear All
If you want to remove all applied filters or return to the initial view without filters, click the Clear All button. This will remove all filters and display the entire return transaction list.
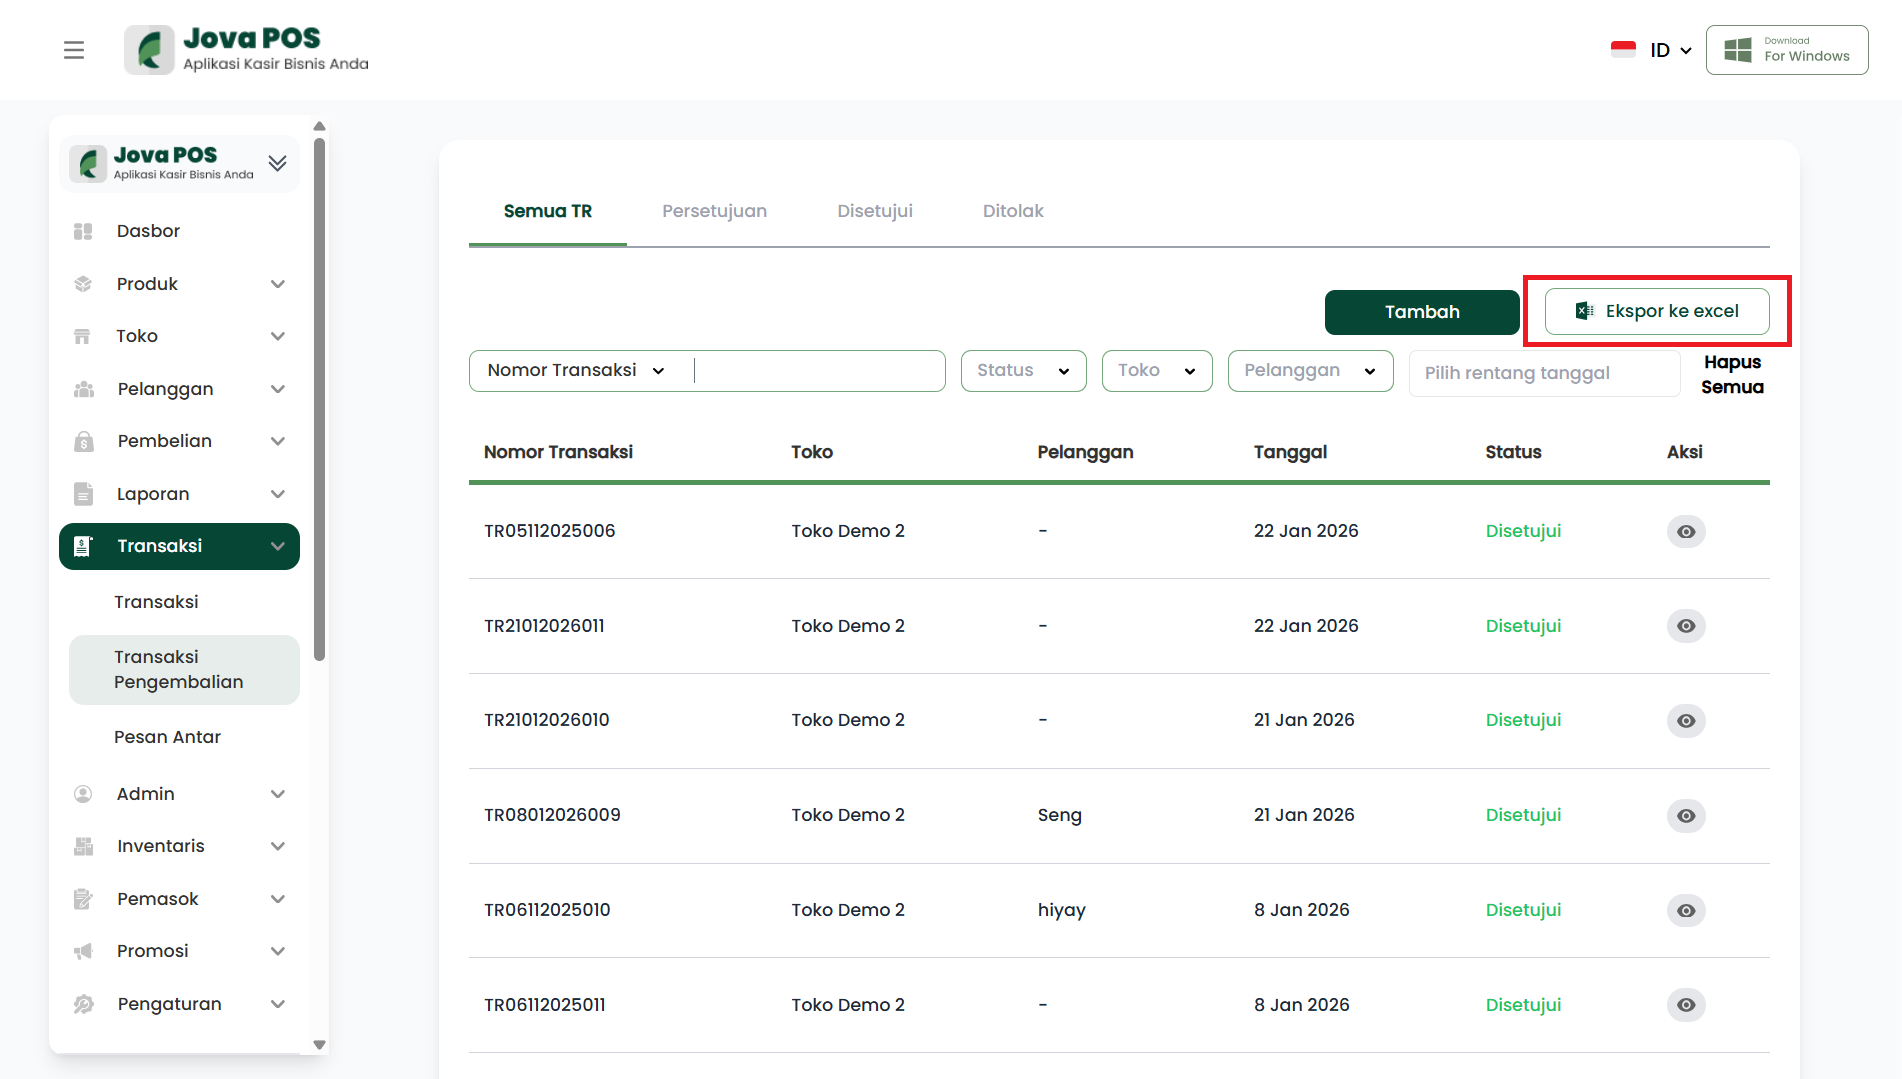
7.3. Export to Excel
If you want to download the return transaction report in Excel format, click the Export to Excel button. The filtered return transaction data (or all data if no filter is applied) will be downloaded in an Excel file that can be used for further analysis.
8. Verifying Return Transactions
After the return transaction appears with "Pending Approval" status, the Admin or Owner can verify the transaction. This verification includes double-checking whether the returned products match what is listed and whether the return reason is correct.
Return Transactions - Approval
This document explains how to process return transactions in the Approval tab of the Jova POS application.
Return Transaction Approval Flow
The general flow for return transaction approval is as follows:
- Access the Transactions → Return Transactions → Approval menu.
- Click the Transaction Number that entered the Approval tab.
- Review the return transaction information.
- Choose whether to accept the transaction by clicking the Approve button or reject it by clicking the Reject button.
- Click the Approve or Reject button to update the transaction status.
- Approved transactions will change status to Approved and rejected transactions will change to Rejected.
1. Accessing the Approval Tab in the Return Transactions Menu
- In the sidebar, click Transactions.
- Select Return Transactions.
- Select the Approval tab to view the list of transactions awaiting approval.
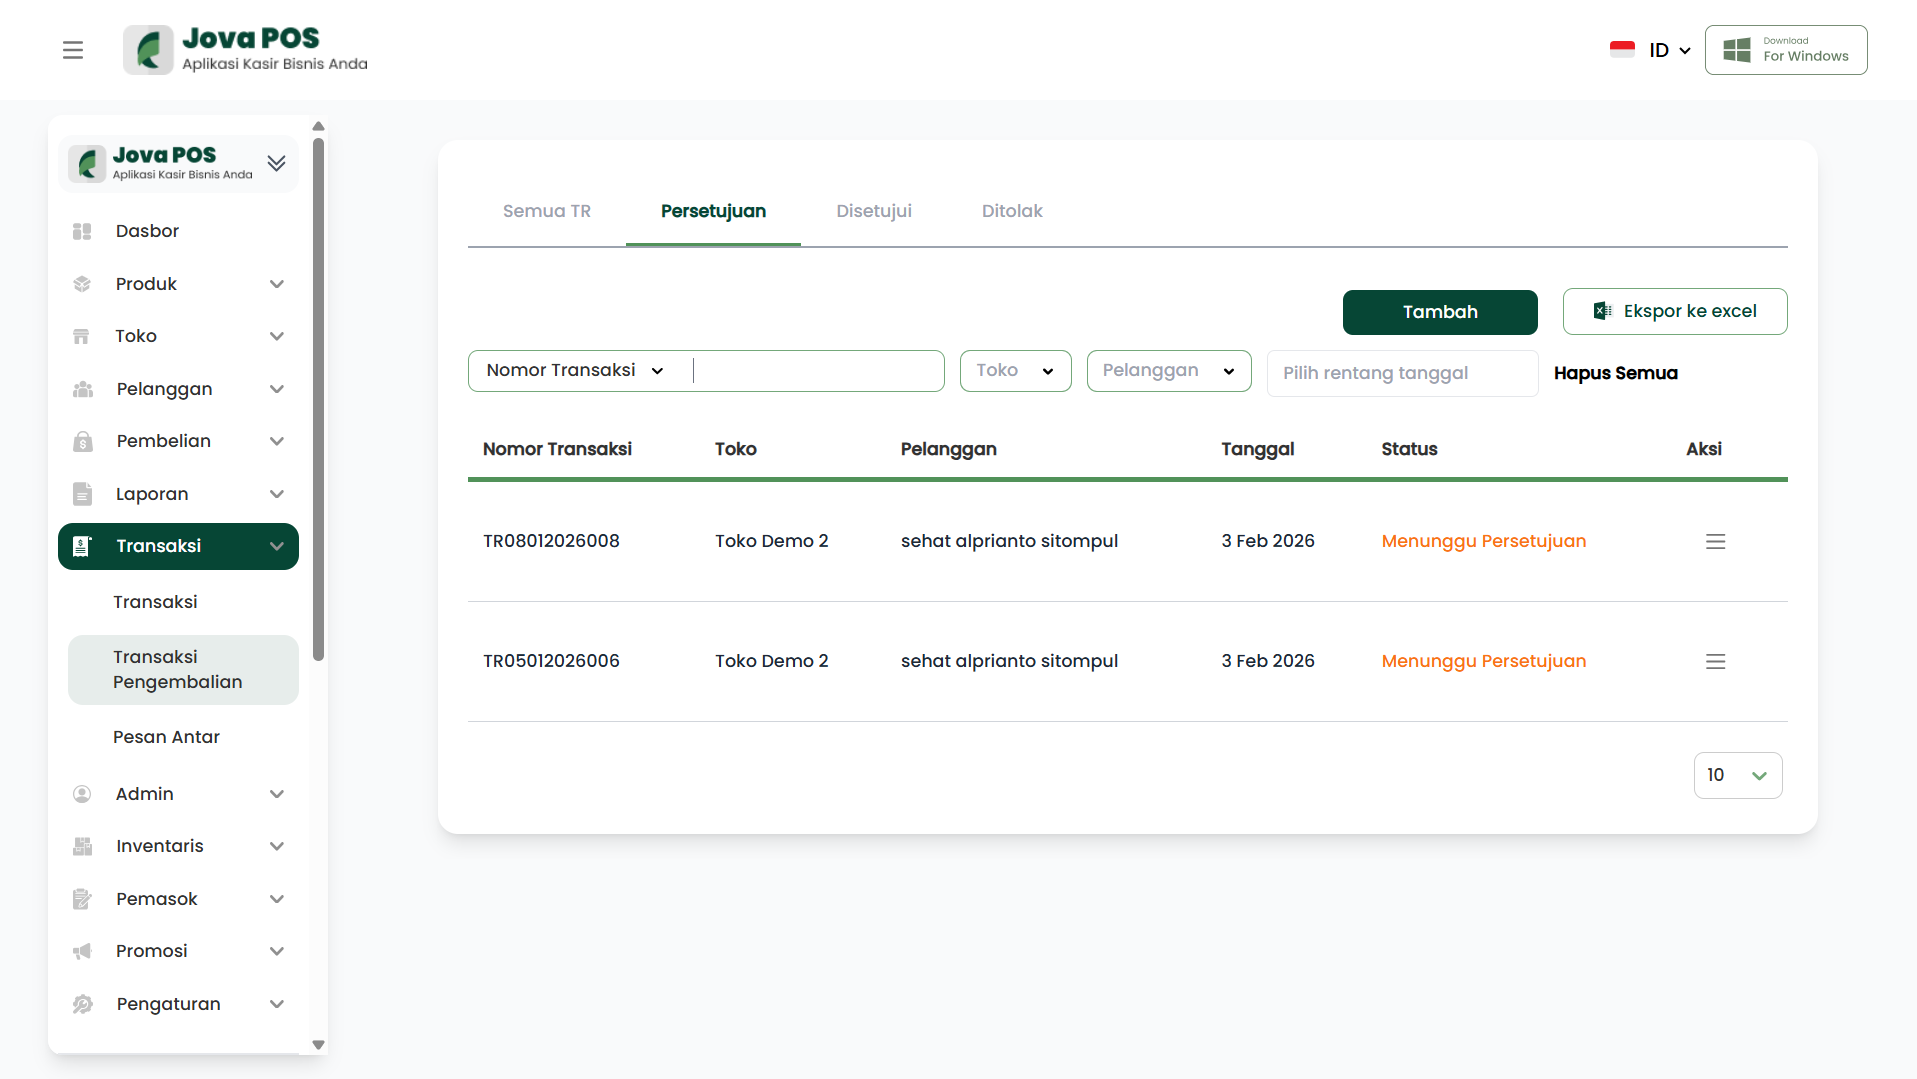
2. Viewing Return Transaction Details
- Click the Transaction Number in the return transaction list awaiting approval.
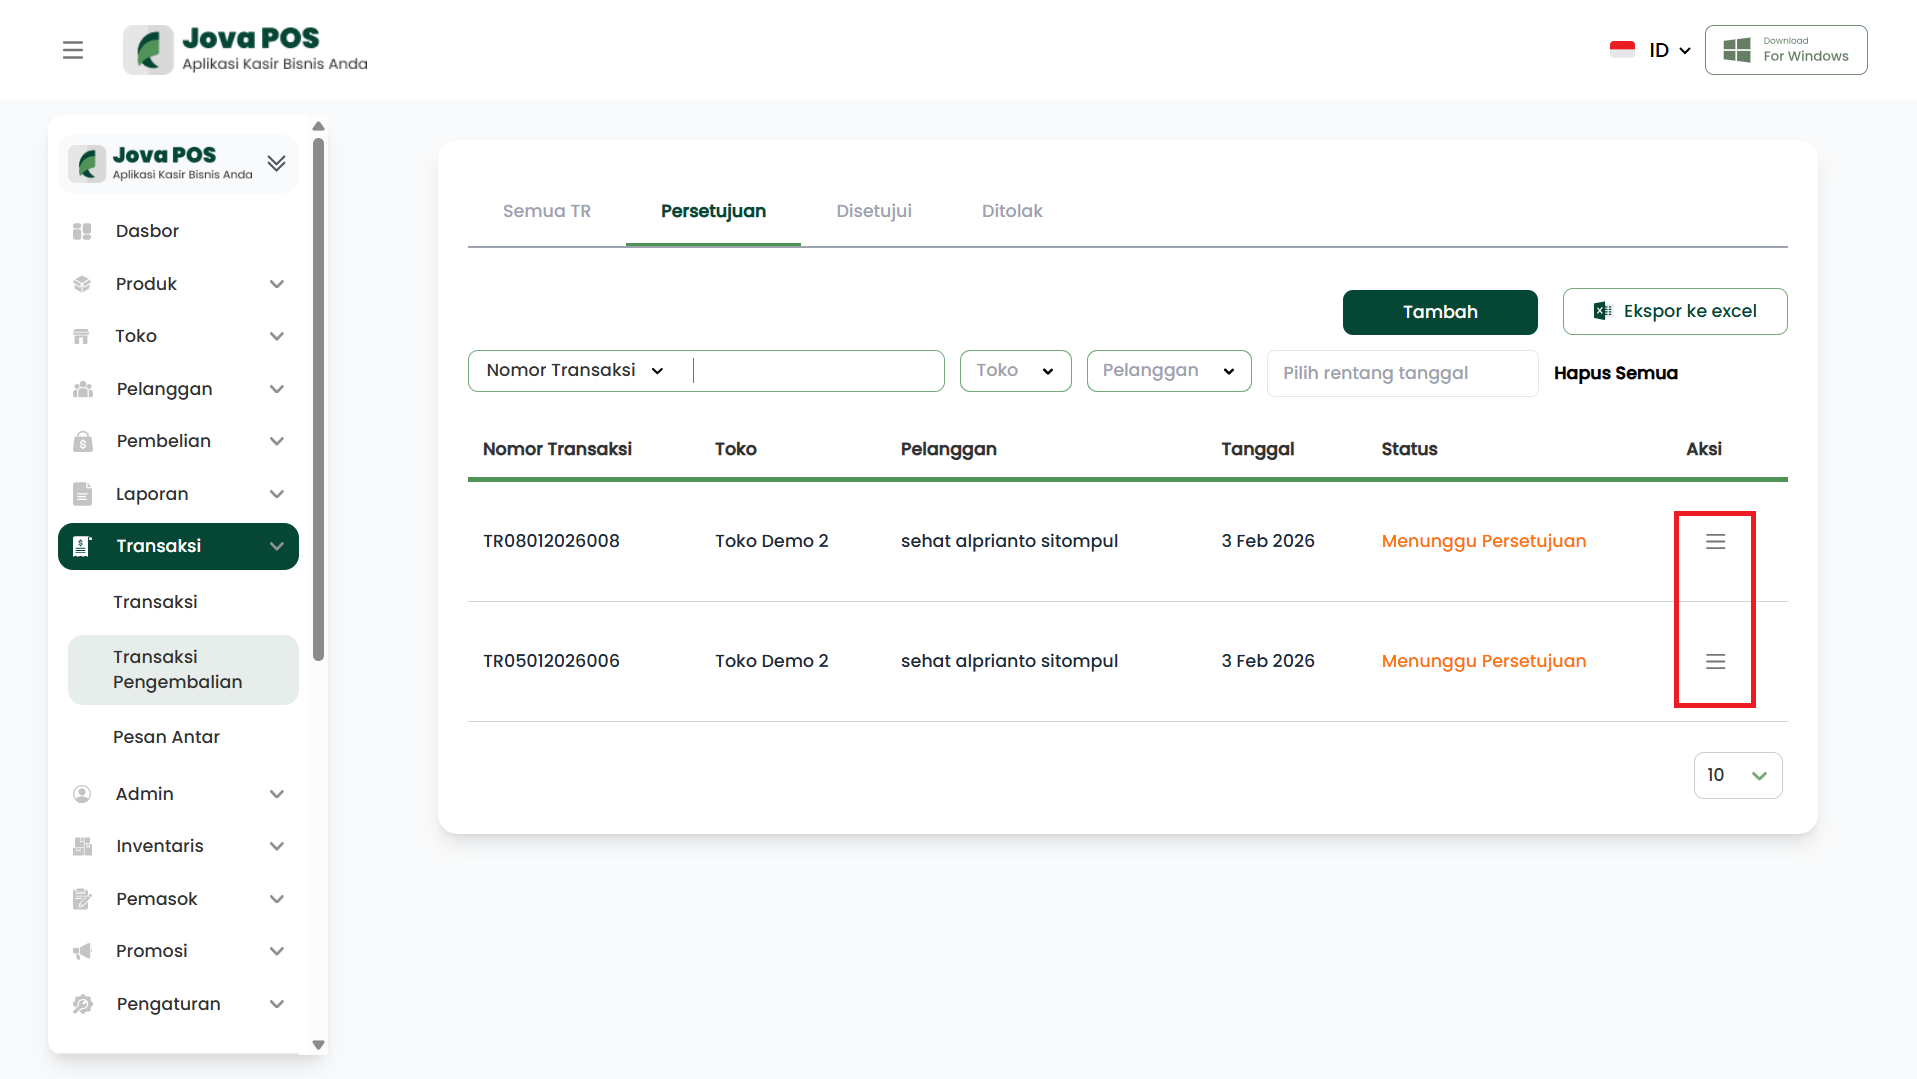
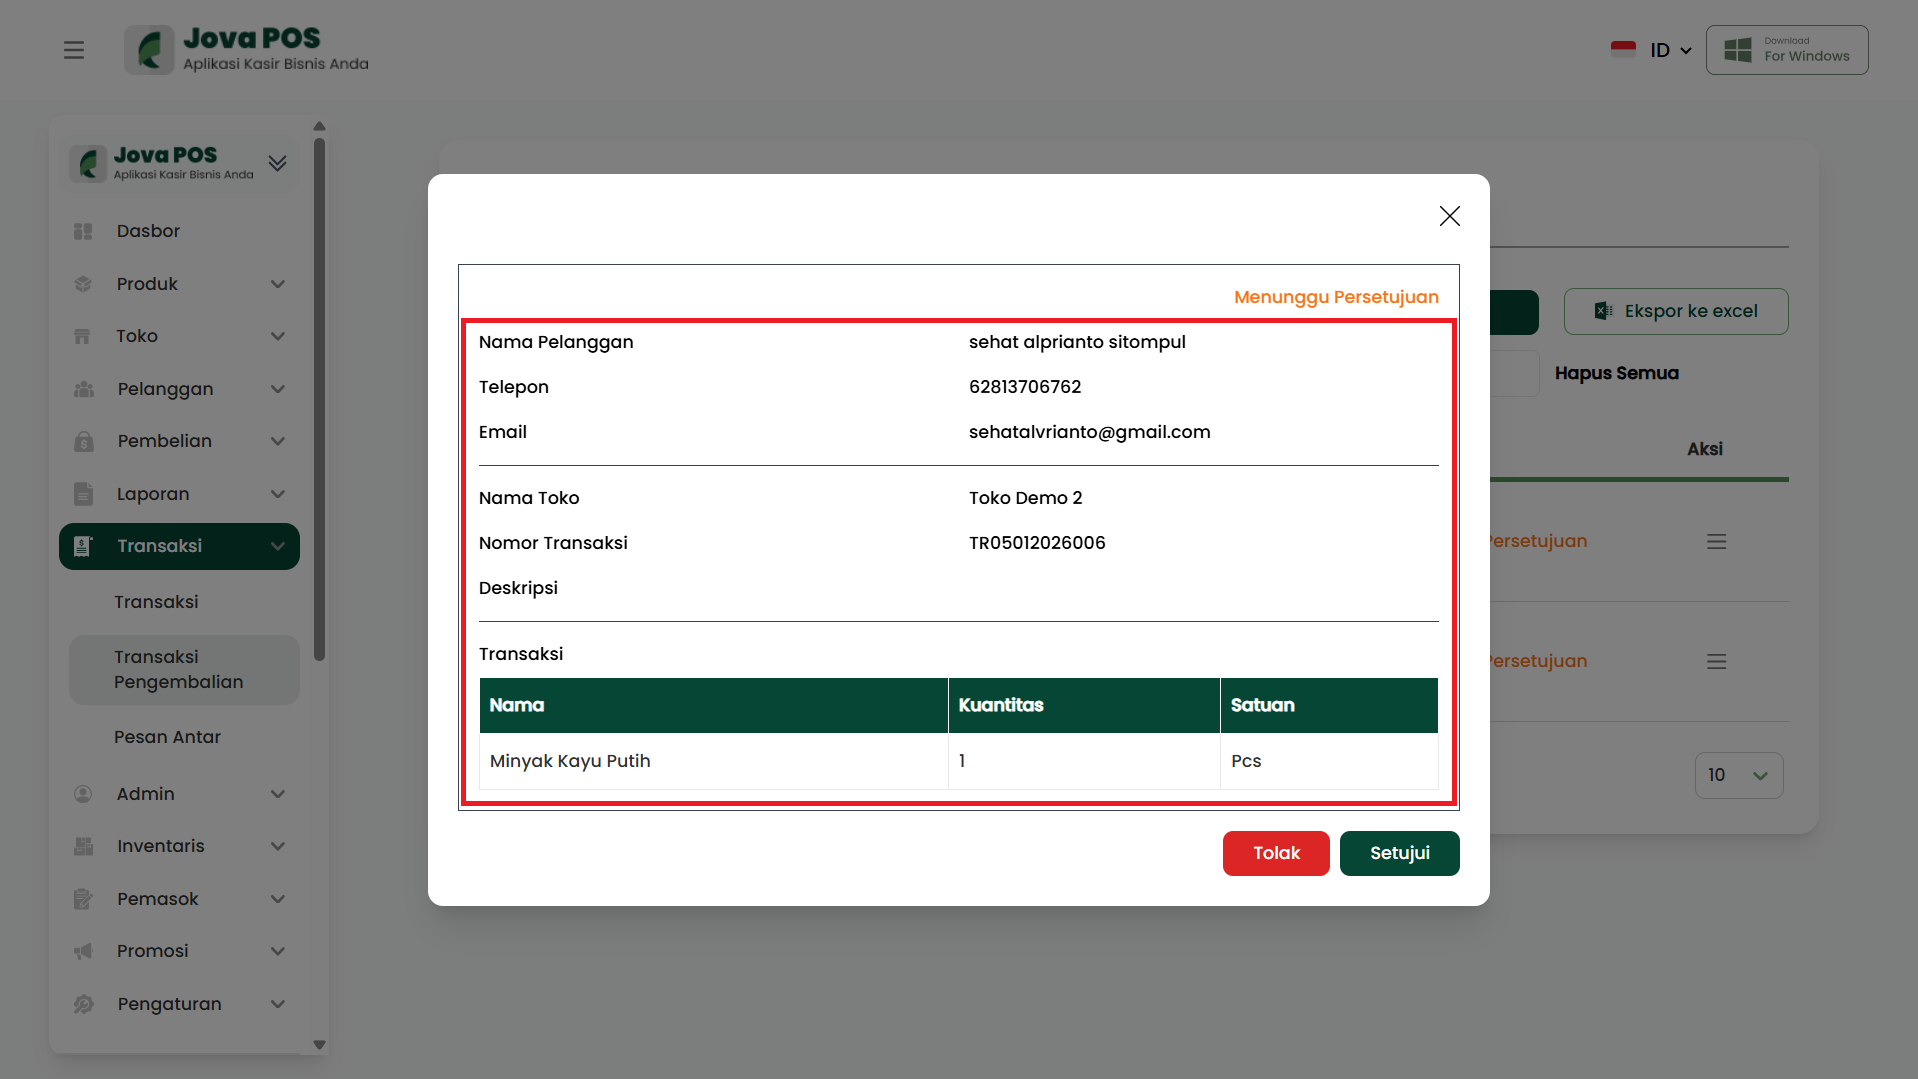
- You will see detailed return transaction information, including:
- Customer Name: The name of the customer submitting the return.
- Phone: The customer's phone number.
- Email: The customer's email address.
- Store Name: The name of the store where the transaction took place.
- Transaction Number: The unique return transaction number.
- Description: Information about the returned products.
- Product Name: The name of the returned product.
- Return Quantity: The number of units returned.
- Unit: The unit of the returned product.
3. Approving or Rejecting Return Transactions
-
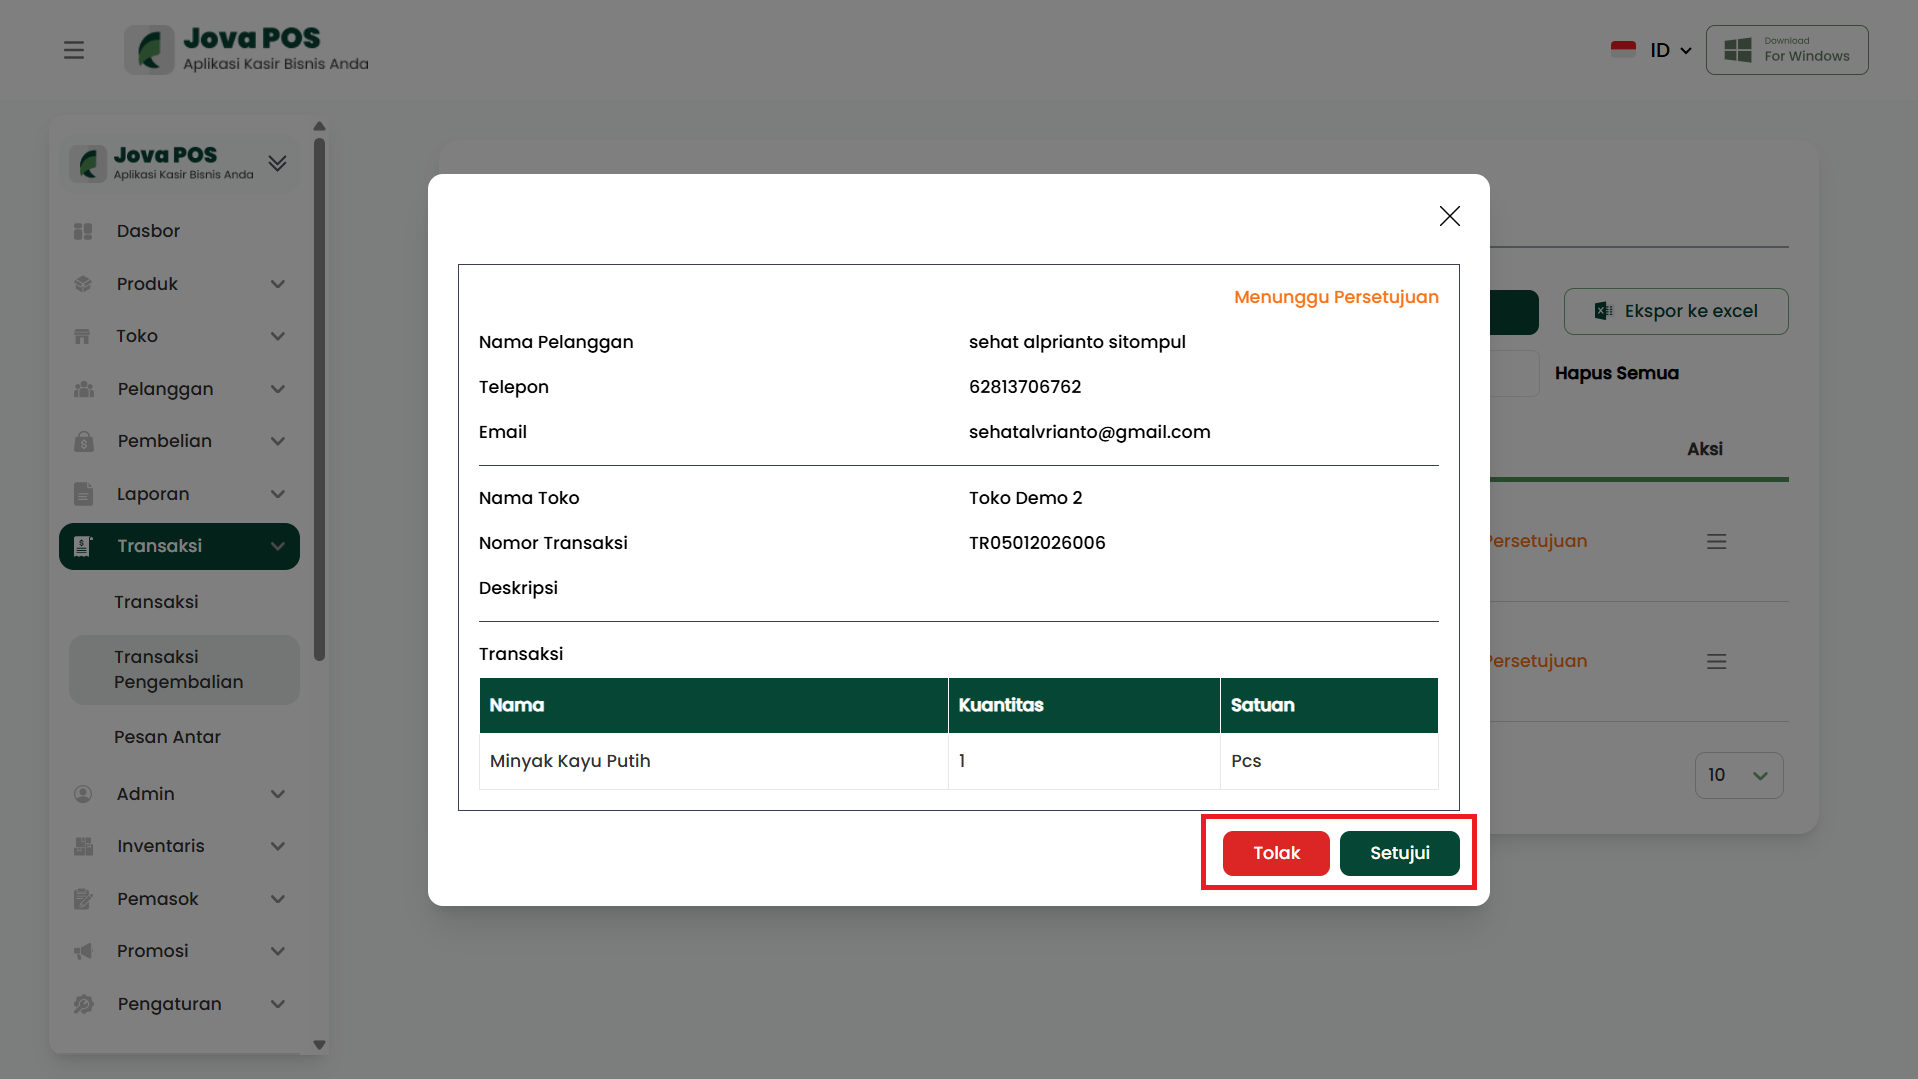
After checking the return transaction details, you have two options:
- Click the Approve button if you want to approve the return transaction.
- Click the Reject button if you want to reject the return transaction.
-
If you choose Approve, the transaction will be processed further and its status will change to Approved.
-
If you choose Reject, the transaction will be marked as Rejected.
4. Status After Approval
After the transaction is processed, the transaction status will be updated:
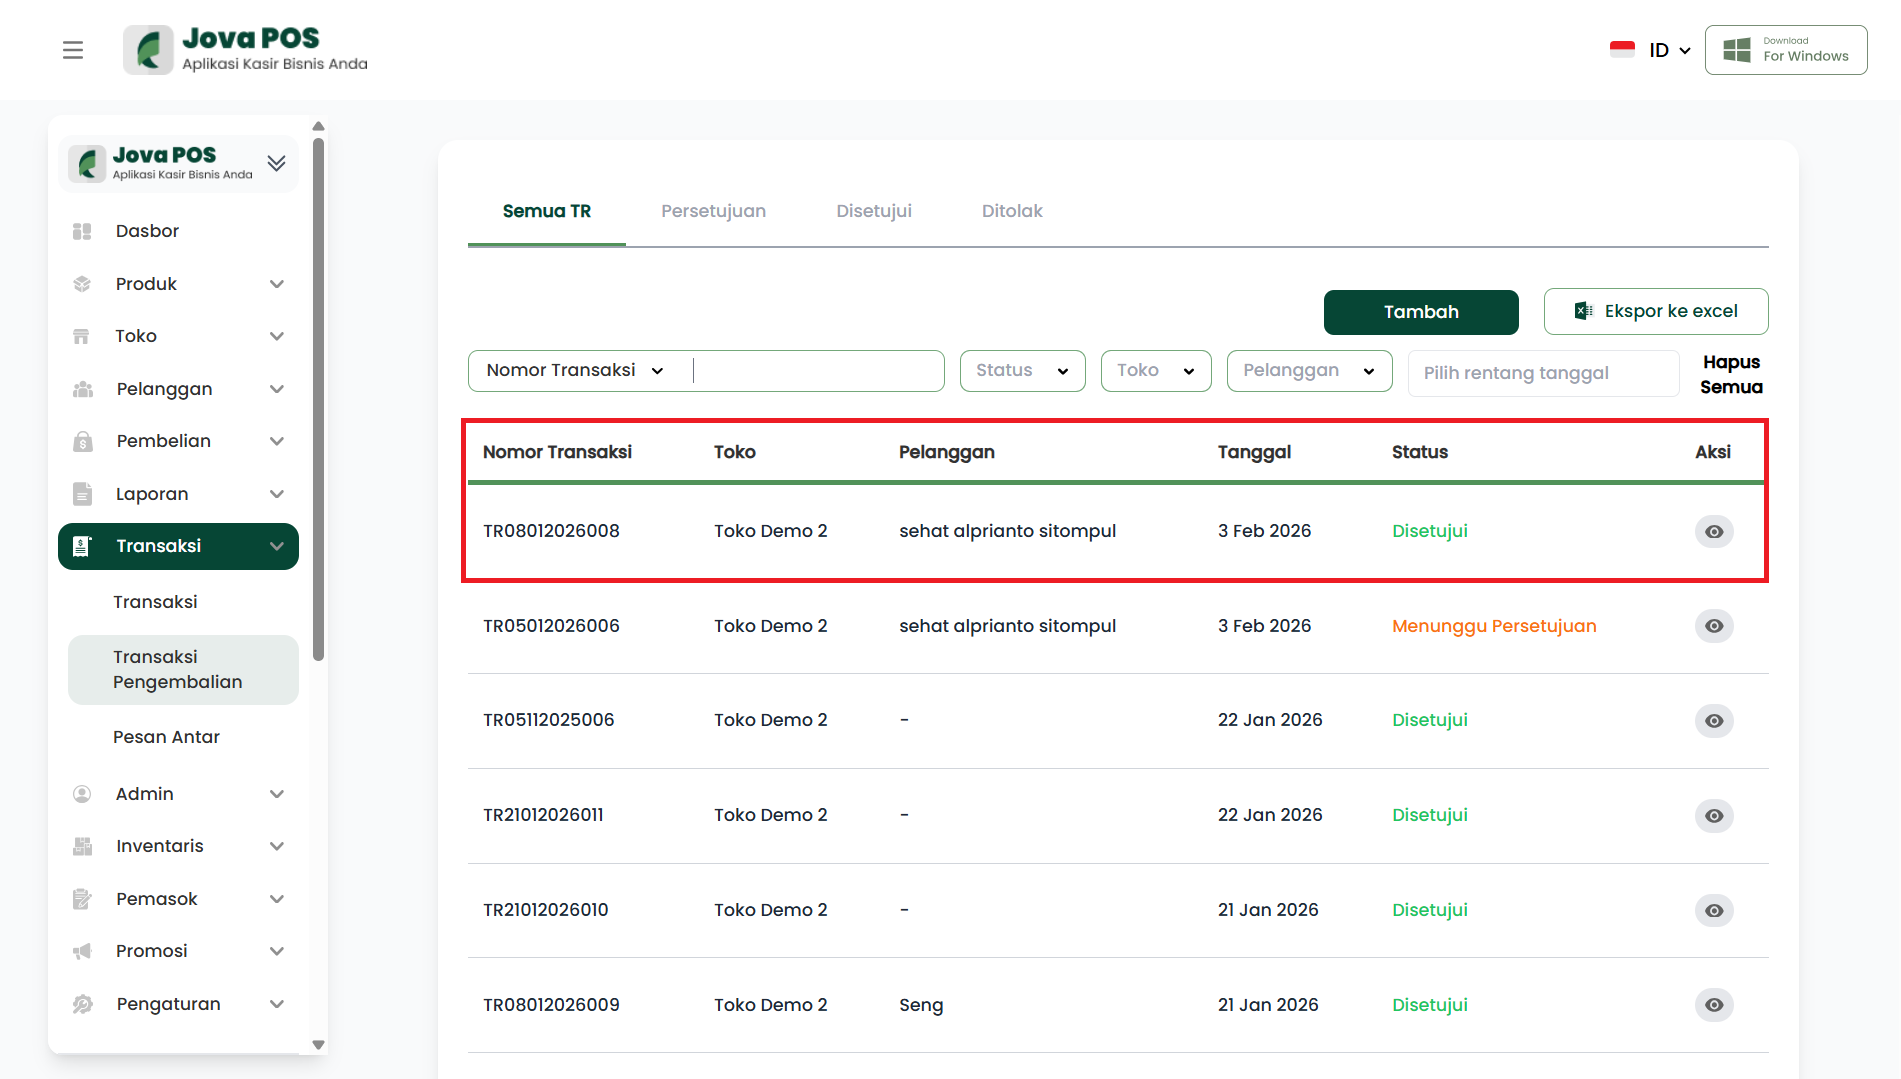
- Pending Approval: Initial status before the transaction is processed.
- Approved: Status after the transaction is accepted and processed.
- Rejected: Status after the transaction is rejected.
5. Filter and Search Transactions
You can use the filter and search features to make it easier to find transactions to approve or reject:
- Transaction Number: Use to search for transactions by unique number.
- Store: Select the store whose report you want to view.
- Customer: Select a customer to view their return transactions.
- Date: Select a date range to filter transactions by specific dates.
6. Export Report
If you want to download the return transaction report, click the Export to Excel button at the top right to download the report in Excel format.
Return Transactions - Approved Tab
This document explains how to manage and view return transactions that have been approved in the Jova POS system.
Approved Return Transaction Management Flow
The general flow is as follows:
- Access the Transactions → Return Transactions menu.
- Select the Approved tab to view approved transactions.
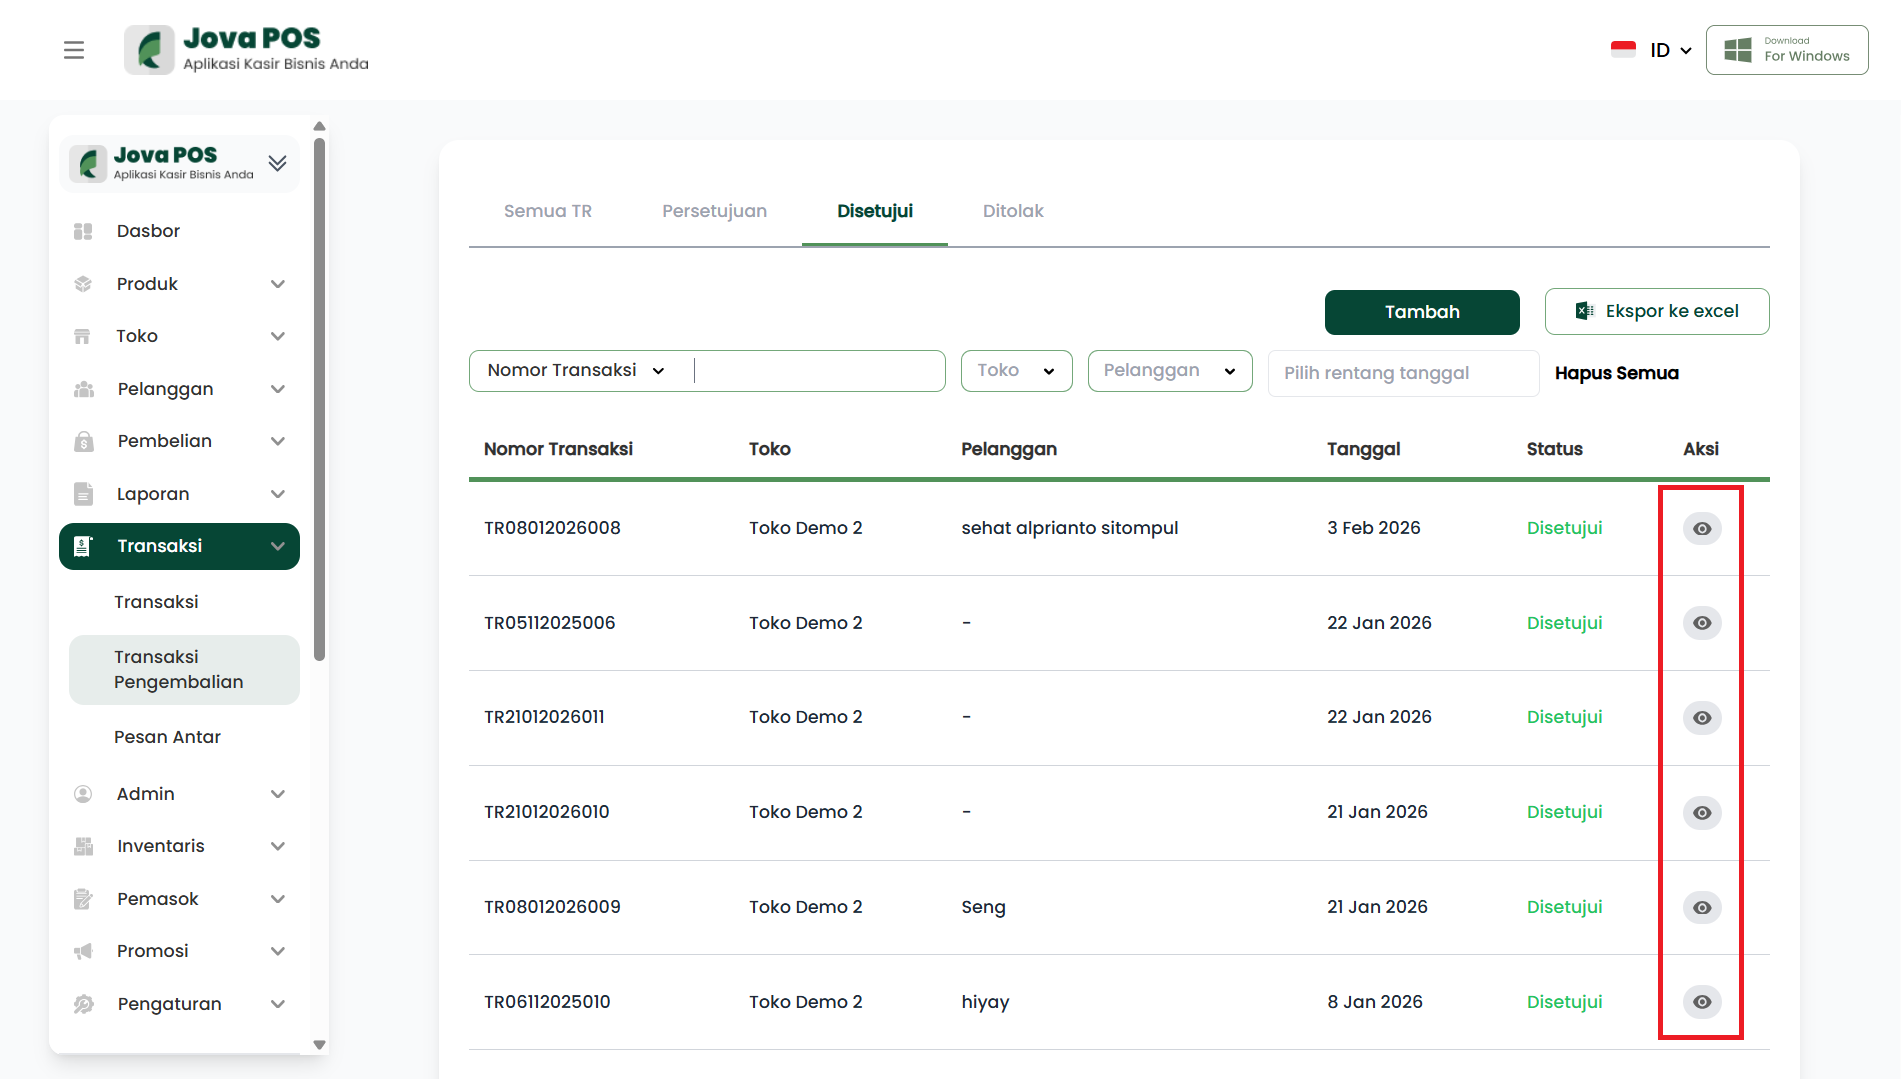
- Click the eye icon in the action column to view transaction details.
- Use the search or filter features to find transactions.
- Export the report to Excel if needed.
- Delete all transactions using the Clear All button if necessary.
1. Accessing the Return Transactions → Approved Menu
- In the sidebar, click Transactions.
- Select Return Transactions.
- Select the Approved tab to view approved transactions.
2. Viewing Approved Return Transaction List
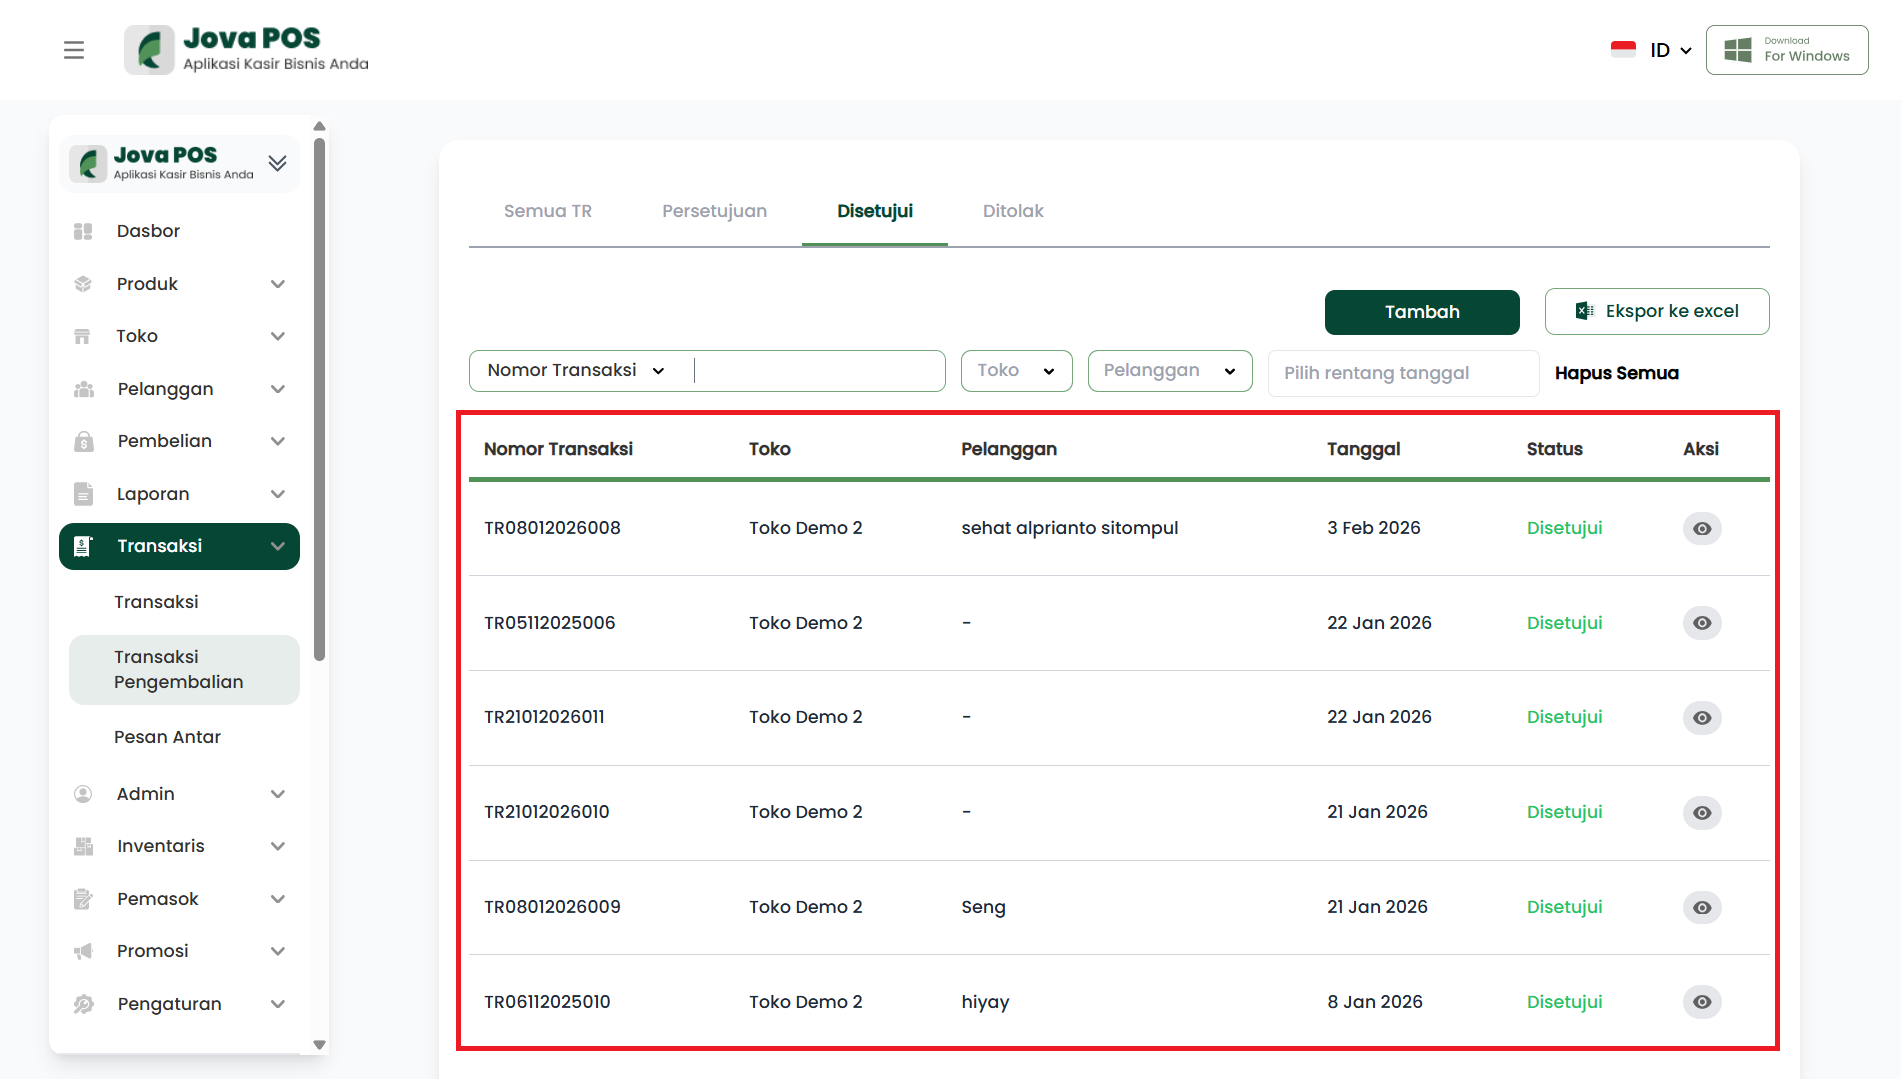
After selecting the Approved tab, you will see a list of approved transactions. The information displayed includes:
- Transaction Number: Unique transaction ID.
- Store: The name of the store related to the transaction.
- Customer: The name of the customer who made the return.
- Date: The date of the return transaction.
- Status: Transaction status, will read "Approved".
- Action: Click the eye icon to view transaction details.
3. Viewing Return Transaction Details
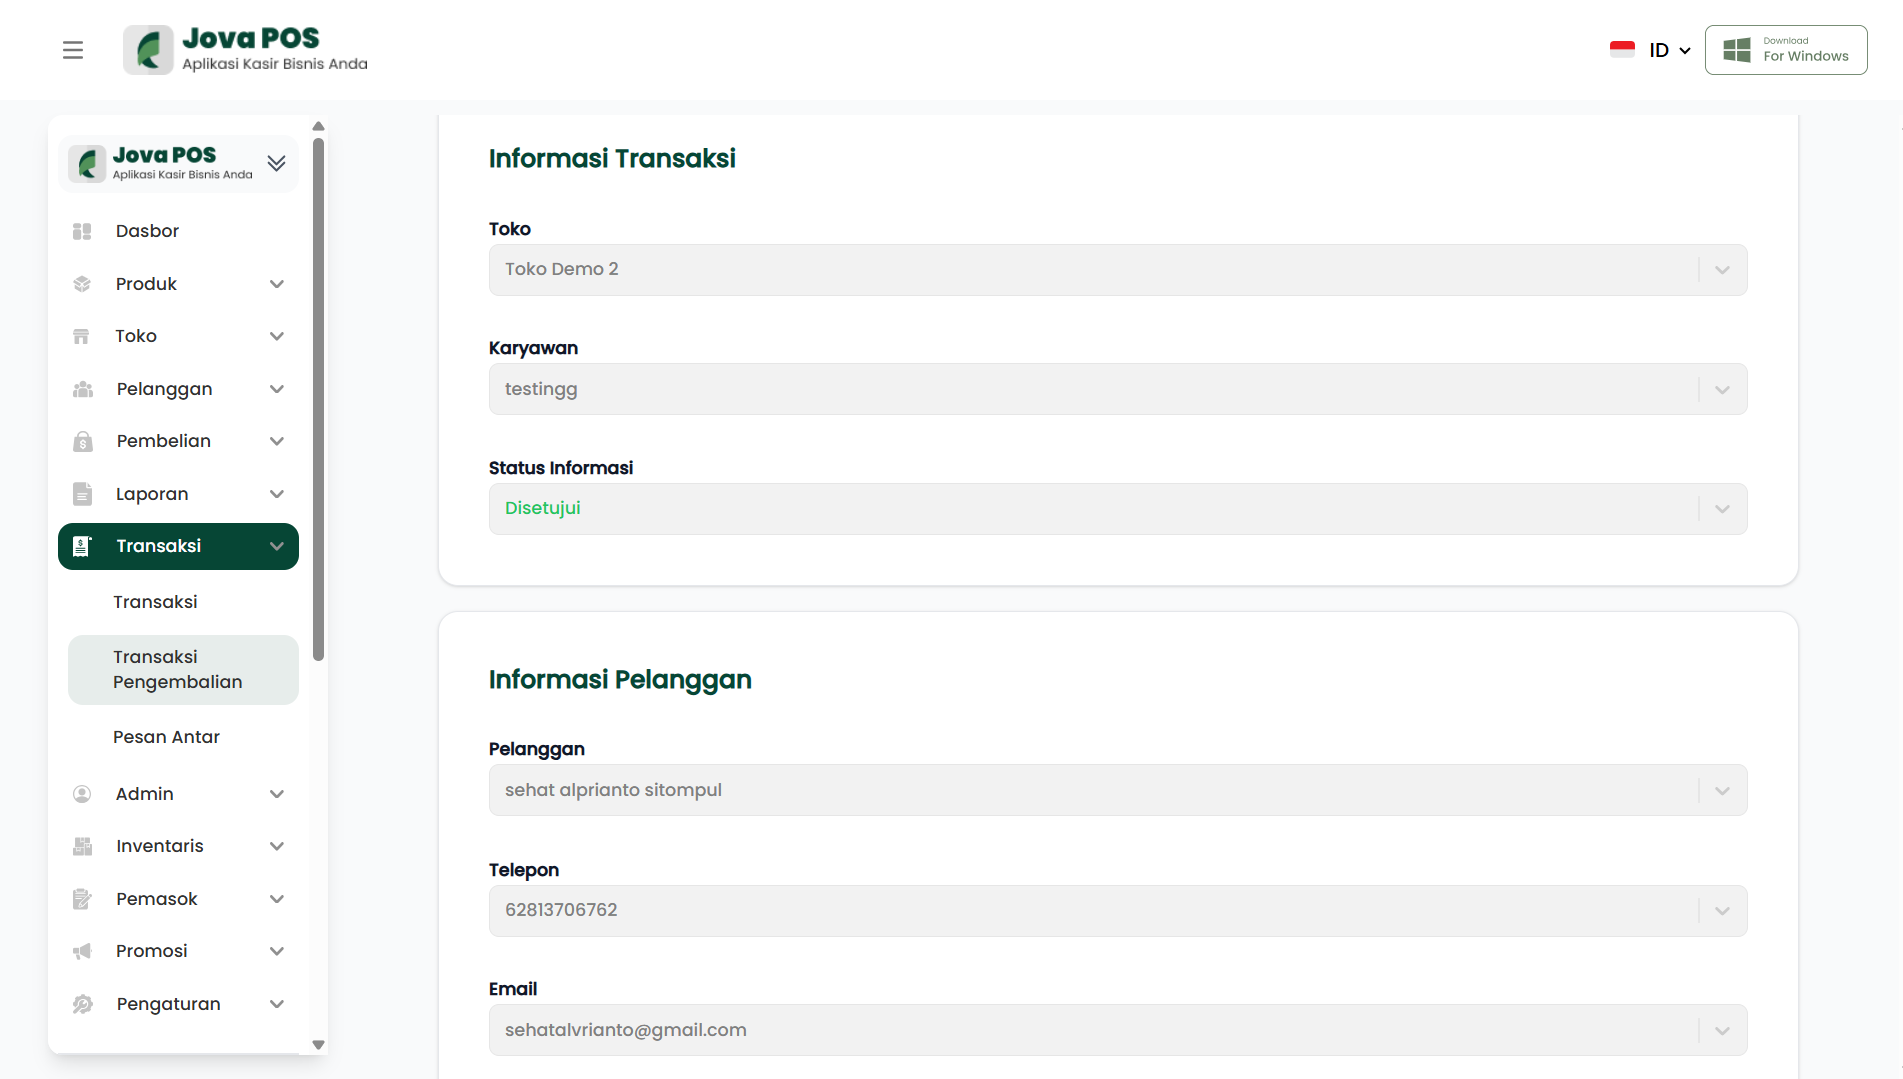
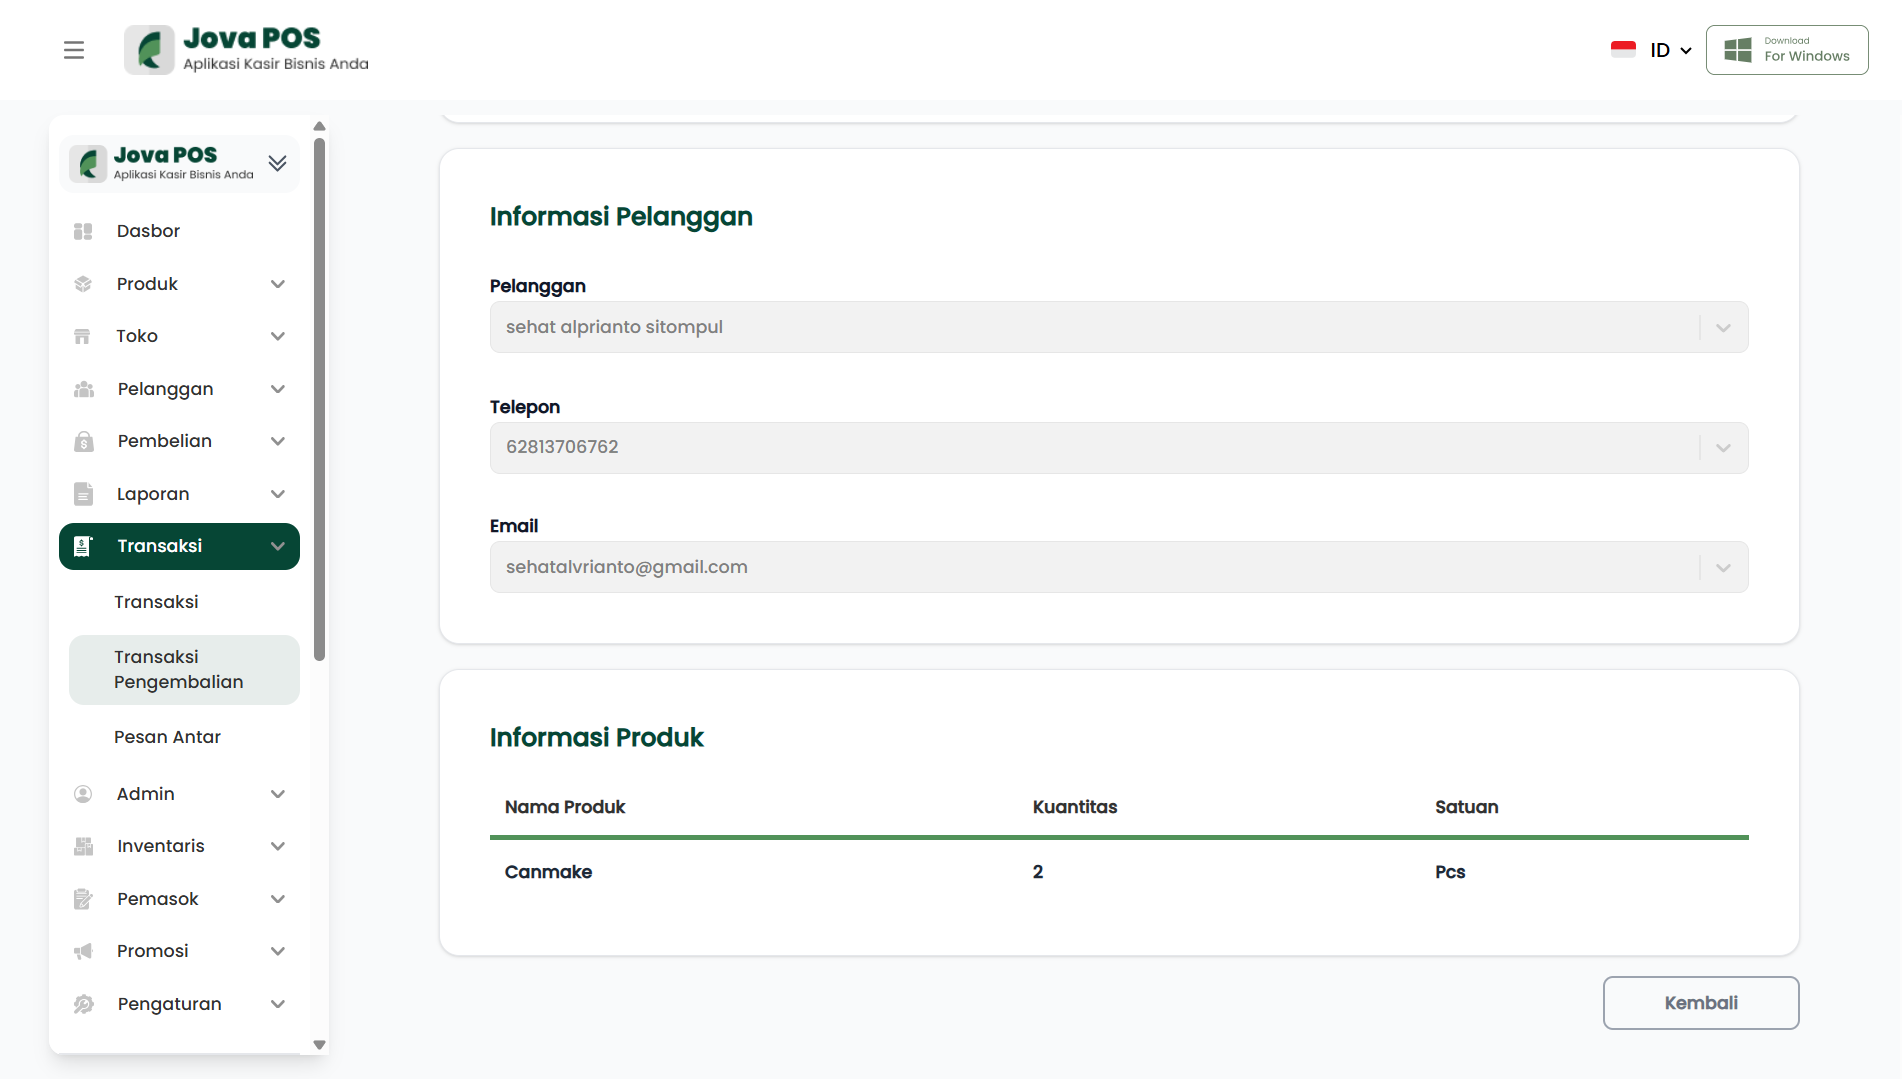
To view transaction details, click the eye icon (view) in the Action column. Details that can be viewed are:
- Transaction Information:
- Store Name
- Employee handling the transaction
- Status information (e.g.: Approved)
- Customer Information:
- Customer name
- Customer phone and email
- Product Information:
- Name of the returned product
- Quantity of returned product
- Unit of returned product
4. Search and Filter
In the Approved tab, you can search for transactions using several parameters:
- Transaction Number: Search by transaction ID.
- Store: Select transactions by specific store.
- Customer: Search by customer name.
- Date Range: Specify dates to find transactions within a specific time range.
Use Search to find transactions faster and filters to narrow down by specific criteria.
5. Export Report to Excel
If you want to save a report or further analyze transaction data, click the Export to Excel button. This will download the transaction report in Excel format that can be opened and managed using a spreadsheet application.
6. Delete All Transactions
If you need to delete all transactions in the Approved tab, you can use the Clear All button. This feature will delete all transactions in the Approved tab and cannot be undone.
Caution: Use this feature carefully as data deletion cannot be recovered.
Rejected Tab - Return Transactions
The Rejected tab in the Return Transactions menu in the Jova POS system is used to display all return transactions that have been rejected. Here, admins or authorized users can review transactions that were not approved for product returns.
1. Rejected Transaction List
All transactions with Rejected status will appear in this tab. The columns displayed include:
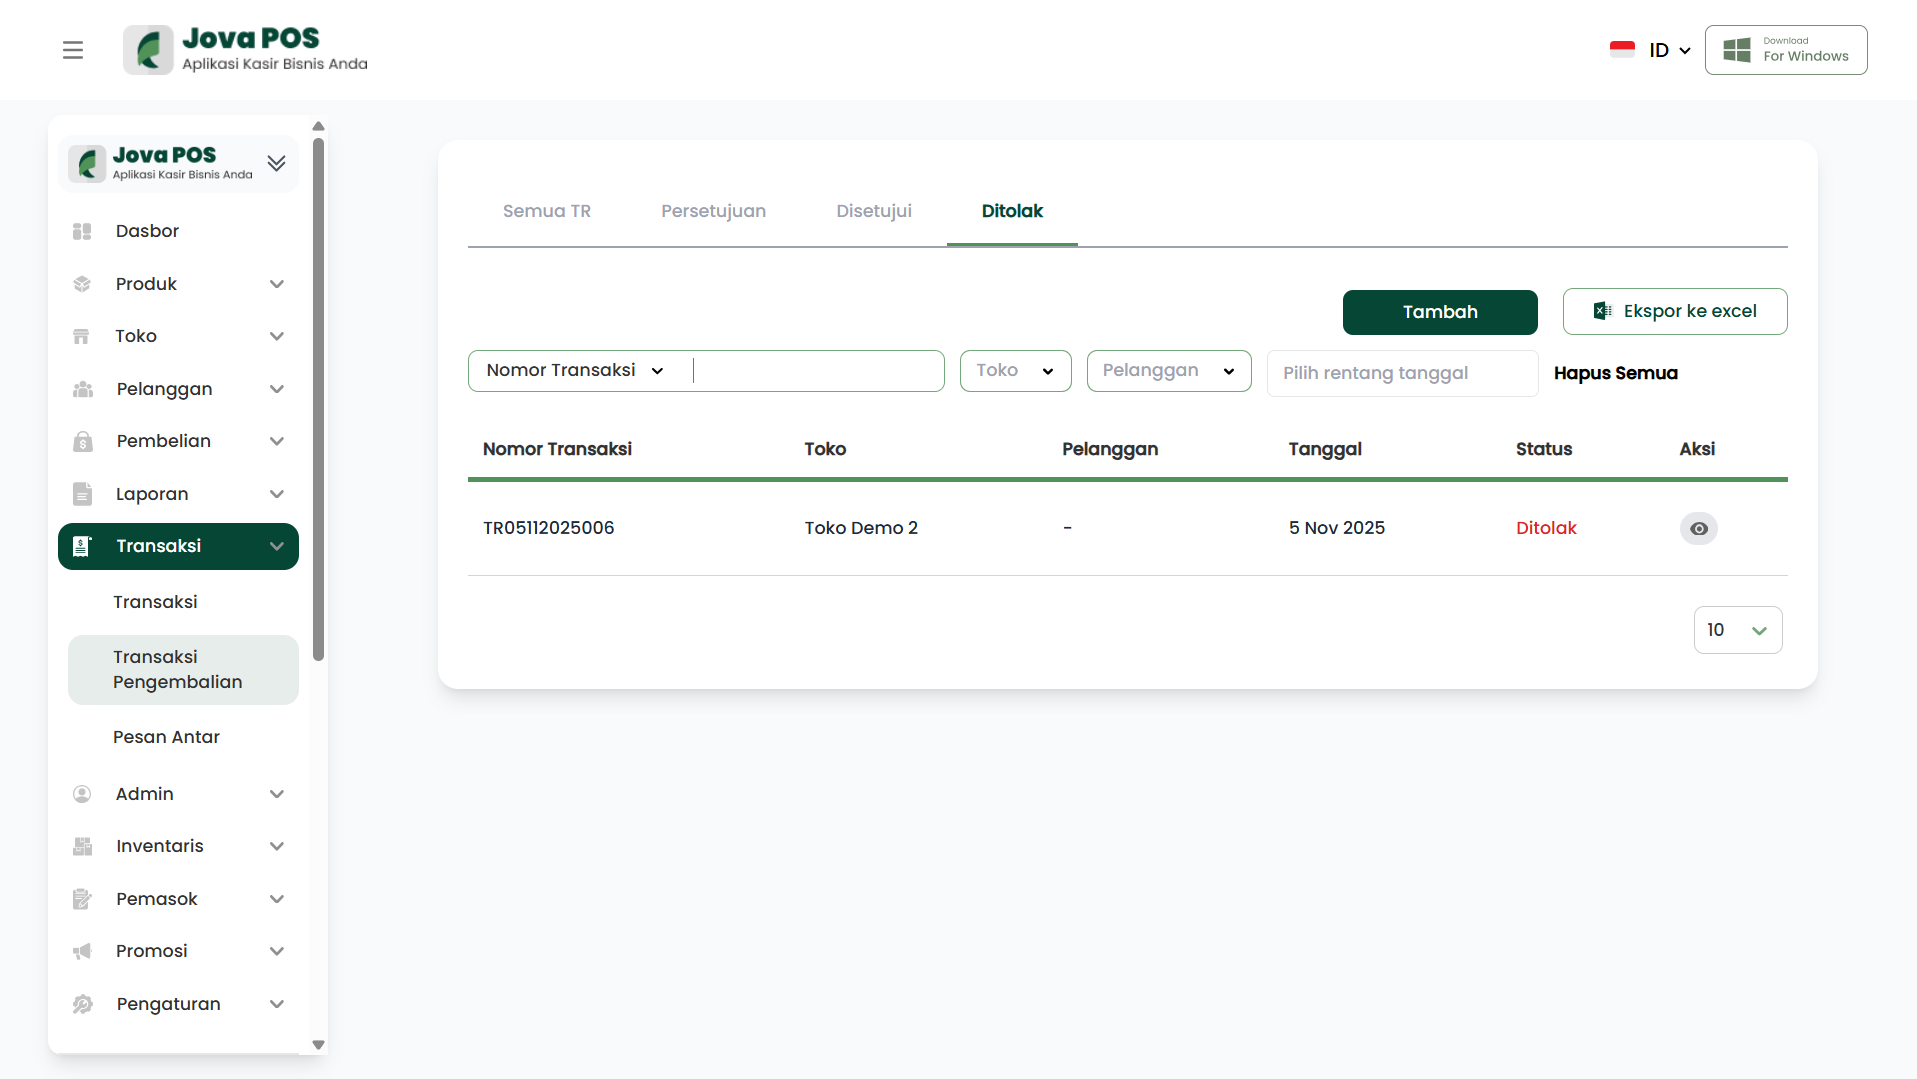
- Transaction Number: Displays the transaction number for each product return.
- Store: The name of the store involved in the return transaction.
- Customer: The name of the customer who submitted the product return.
- Date: The date the return transaction occurred.
- Status: Displays the transaction status as Rejected.
2. Viewing Transaction Details
You can view detailed transaction information by clicking the View button in the action section.
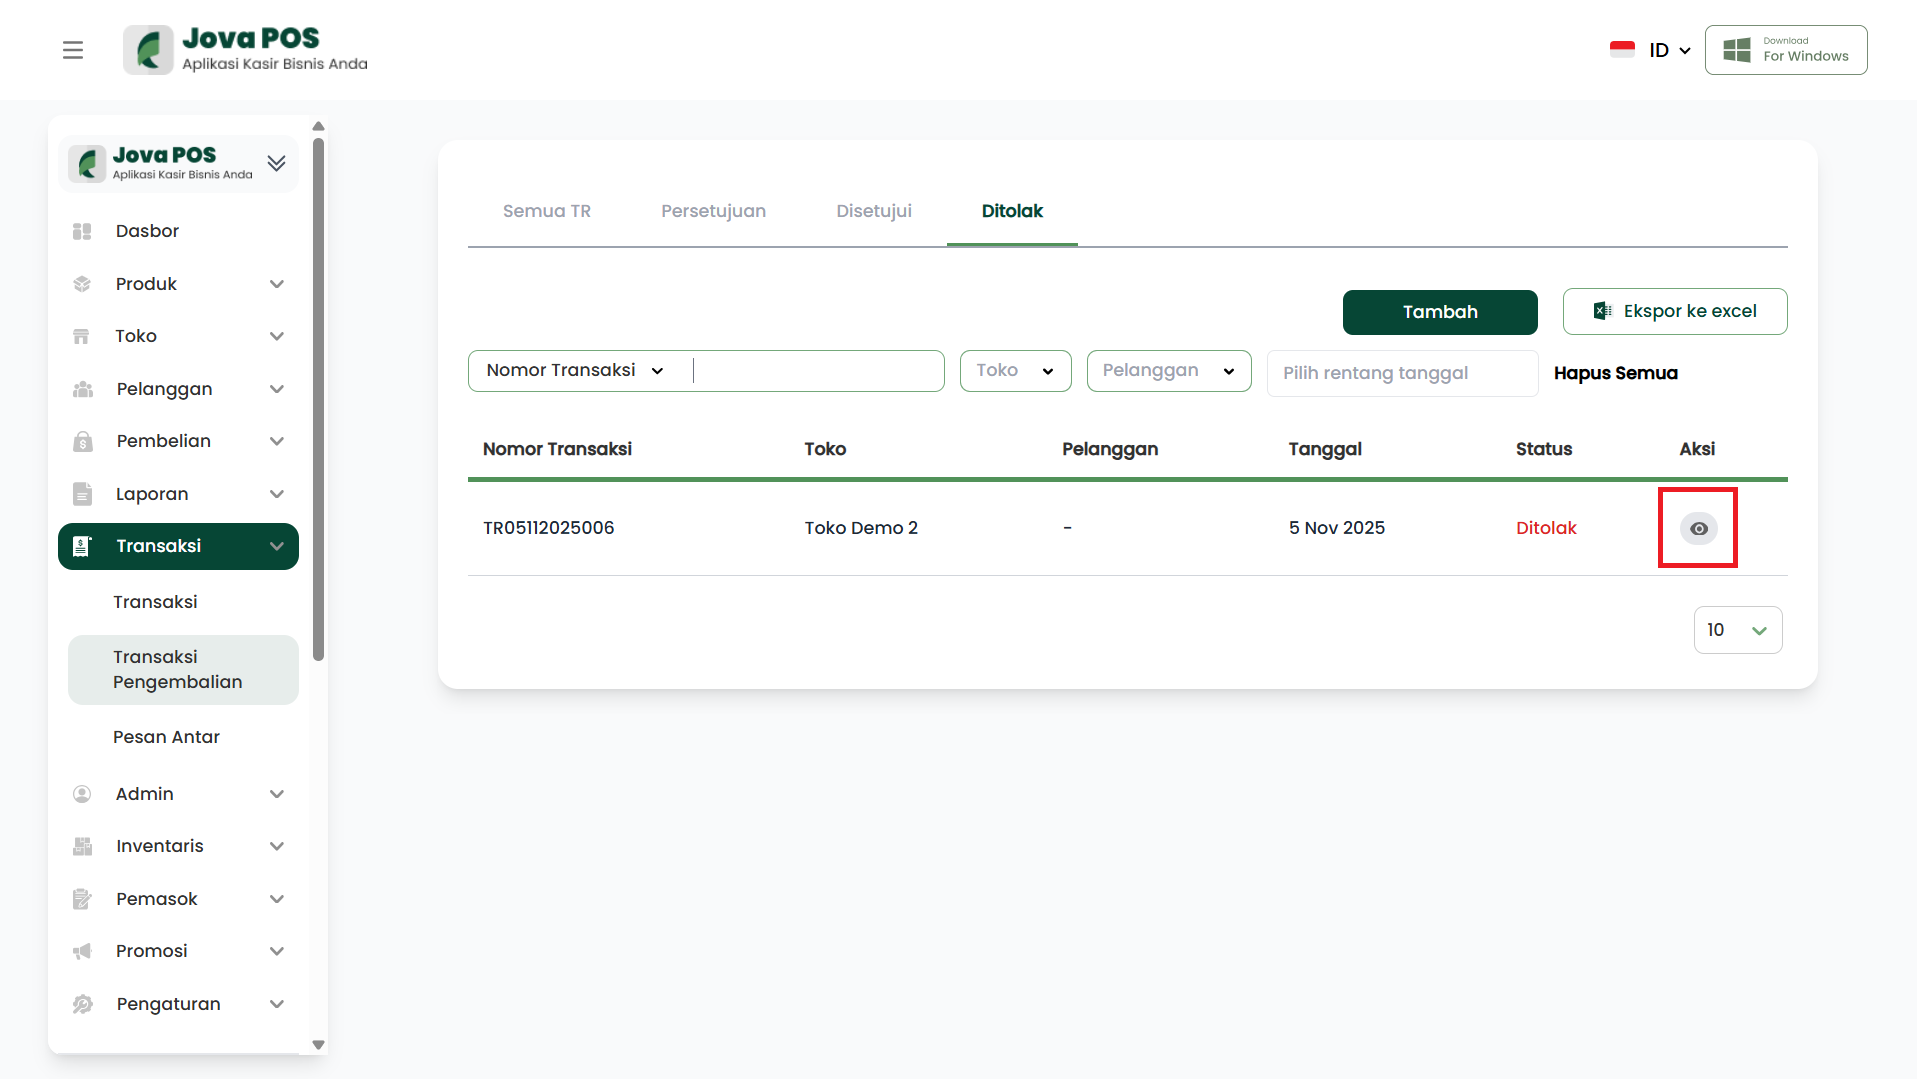
- Store Name: The name of the store where the transaction took place.
- Employee: The name of the employee who processed or approved the return transaction.
- Status Information: Indicates that this transaction has been Rejected.
- Product Information: Name of the returned product and quantity.
Conclusion
The Rejected tab allows the admin to easily monitor rejected return transactions. Through this tab, you can view information related to rejection reasons and take further action if necessary.
Conclusion
The Return Transactions feature in Jova POS makes it easy for you to manage and process product returns. By following this guide, you can ensure that each return is recorded correctly, return transaction reports can be accessed at any time, and all returns can be easily monitored.
If you have questions or need further assistance regarding return transactions, the Jova POS support team is ready to help you.